
Article Plan: Bible Tabs Printable Free Download PDF (as of 05/04/2026 08:11:14)
This guide details accessing free, printable Bible tabs in PDF format, offering a convenient way to organize scripture for enhanced study and navigation.
Bible tabs eliminate frustrating searches, allowing focused immersion in scripture; printable, free options offer customizable organization, enhancing study and providing quick access to favorite verses.
Why Organize Your Bible?
Organizing your Bible transforms it from a collection of texts into a readily accessible resource for spiritual growth. Without organization, locating specific passages becomes a time-consuming task, hindering consistent study. A well-organized Bible fosters deeper engagement with scripture, enabling efficient topical studies and easier memorization of key verses.
Effective organization minimizes distractions, allowing you to concentrate on understanding God’s Word. Printable tabs provide a personalized system, catering to individual study preferences and making the Bible a more inviting and useful tool for daily devotion and learning. It’s about maximizing your time with scripture!
The Frustration of Searching for Verses
The familiar struggle of flipping endlessly through pages, desperately seeking a specific verse, is a common experience for many Bible readers. This frustration disrupts the flow of study and can diminish the joy of engaging with scripture. Precious moments are lost, and concentration wanes as you navigate the lengthy books and chapters.
This tedious process can be particularly discouraging when preparing for Bible study, teaching, or simply seeking guidance. It’s a barrier to consistent engagement, making it harder to build a regular habit of reading and reflecting on God’s Word.
How Bible Tabs Solve the Problem
Bible tabs offer a simple yet remarkably effective solution to the challenge of verse location, transforming a frustrating search into effortless navigation. These small, strategically placed markers allow you to instantly pinpoint specific books and chapters, eliminating wasted time and preserving your focus on the text itself.
With a well-organized tab system, accessing favorite passages, key themes, or verses for study becomes incredibly efficient. This ease of access encourages deeper engagement and fosters a more rewarding experience with scripture, allowing for smoother study.
Types of Bible Tabs Available
Various Bible tab options exist, including pre-made, printable (DIY), and digital versions, each offering unique benefits regarding cost and customization.
Pre-Made Bible Tabs: Convenience and Cost
Pre-made Bible tabs represent the most convenient option for those seeking immediate organization without the effort of printing and cutting. These tabs are readily available in diverse styles and colors, catering to individual preferences and aesthetic tastes. However, this convenience comes at a cost; pre-made tabs generally require a financial investment.
The price range can vary significantly depending on the material, design, and quantity included in the set. While offering a quick solution, pre-made tabs lack the personalization opportunities afforded by printable alternatives. They are ideal for users prioritizing ease of use over customization, providing a straightforward path to a more organized Bible experience.
Printable Bible Tabs: Customization and Savings
Printable Bible tabs offer a compelling alternative, prioritizing customization and cost-effectiveness. Downloading and printing your own tabs allows for complete control over design, color schemes, and even the inclusion of thematic elements. This DIY approach is particularly appealing to those who enjoy crafting or desire a uniquely personalized Bible study experience.
The primary advantage lies in the significant savings compared to pre-made options; free printable templates are widely available online. However, this method requires an investment of time and effort for printing, cutting, and adhering the tabs. Despite this, the flexibility and affordability make printable tabs a popular choice.
Digital Bible Tabs: Apps and Software Options
Beyond physical tabs, a growing number of digital solutions offer similar organizational benefits within Bible study apps and software. These options allow users to create and manage virtual tabs, bookmark verses, and add notes directly within their digital Bible. Popular apps often feature color-coding and tagging systems for enhanced navigation.
While lacking the tactile feel of physical tabs, digital alternatives provide convenience and portability, syncing across multiple devices. They eliminate the need for printing and cutting, offering a streamlined experience. However, reliance on technology and potential subscription costs are considerations.

Focusing on Free Printable Bible Tabs
Free printable Bible tabs offer a budget-friendly, customizable solution for organizing scripture, eliminating the cost of pre-made options and enabling personalized designs.
The Appeal of Free Resources
The allure of free printable Bible tabs stems from accessibility and cost-effectiveness. Many individuals and ministries generously offer these resources online, removing financial barriers to Bible organization. This is particularly beneficial for students, those on a budget, or anyone wanting to experiment with different tab styles before investing in pre-made sets.
Furthermore, free resources empower users to personalize their Bibles. Instead of being limited to available colors or designs, individuals can print multiple sets, experiment with color-coding schemes, and create tabs perfectly suited to their study habits and preferences. This DIY approach fosters a deeper connection with scripture and enhances the overall study experience.
Advantages of DIY Printable Tabs
Creating your own printable Bible tabs unlocks a realm of customization unavailable with pre-made options. You gain complete control over color schemes, enabling thematic organization – perhaps coding Old Testament laws differently than New Testament grace. This personalization boosts retention and study efficiency.
DIY tabs also offer flexibility in size and material. Adjust dimensions to perfectly fit your Bible’s margins, and choose paper weight for durability. This hands-on approach fosters a deeper engagement with scripture, transforming organization into a meaningful act of devotion and tailored study;
Where to Find Reliable Free Printable Options
Numerous online resources offer free printable Bible tabs, but discerning quality is crucial. Websites dedicated to Christian resources and crafting blogs frequently provide downloadable PDF files. Look for sites with clear previews and positive user reviews to ensure accuracy and usability.
Reputable sources often include complete 66-book sets, alongside helpful guides for placement. Be cautious of sites with excessive advertising or unclear terms of use. Prioritize options offering high-resolution downloads for crisp, clean printing and a professional finished look for your Bible.

Essential Components of a Printable Bible Tab Set
A comprehensive set includes 66 book tabs, optional chapter markers, and a color-coding system for visually organizing scripture effectively and efficiently.
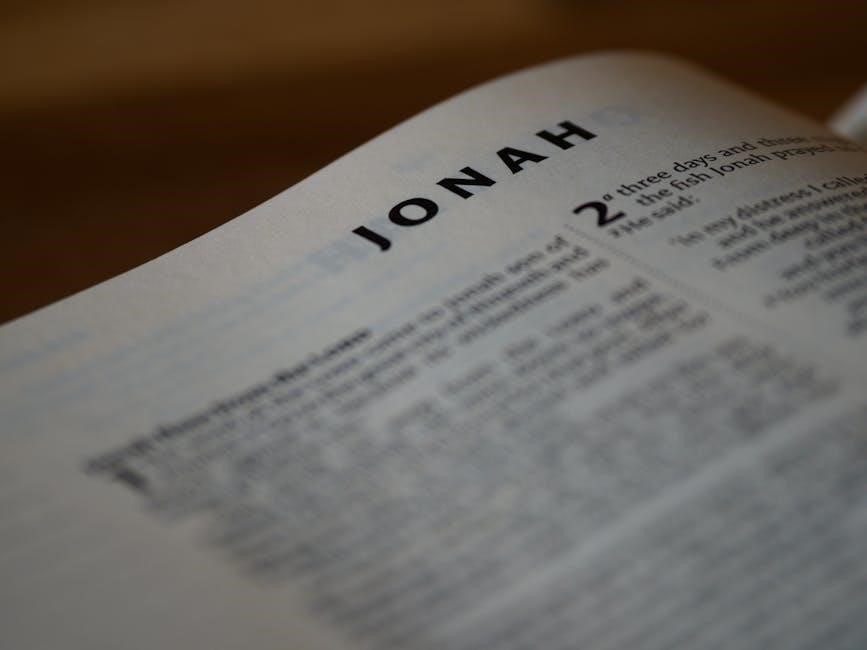
66 Book Tabs: Covering the Entire Bible
The foundation of any printable Bible tab set is a complete collection of 66 tabs, one for each book within the Bible. This ensures every section is clearly marked, facilitating quick and easy navigation through both the Old and New Testaments.
Having a dedicated tab for each book eliminates the frustrating search for specific passages. Whether you’re studying a particular theme, following a reading plan, or simply seeking a favorite verse, these tabs provide immediate access.
Many free printable options prioritize including all 66 books, recognizing this as the core requirement for effective Bible organization. This comprehensive approach streamlines your study experience.
Chapter Tabs: For Detailed Navigation (Optional)
While 66 book tabs offer excellent organization, some users desire even greater precision with chapter tabs. These smaller tabs mark the beginning of each chapter within a book, allowing for pinpoint accuracy when locating specific verses or passages.
However, adding chapter tabs is a more involved process, requiring significant time for printing, cutting, and application. It’s considered an optional enhancement, best suited for those who frequently reference specific chapters.
Free printable sets rarely include pre-made chapter tabs due to the sheer volume required; DIY creation is typically necessary for this level of detail.
Color-Coding Systems: Enhancing Visual Organization
Beyond simple book identification, color-coding Bible tabs elevates organization to a new level. Assigning colors to different genres – like Law, History, Poetry, or Prophecy – provides an immediate visual cue to a passage’s category.
Alternatively, colors can represent themes, such as faith, love, forgiveness, or salvation, facilitating topical study. This system allows quick identification of related verses throughout scripture.
Many free printable tab sets offer pre-defined color schemes, while others allow for complete customization, empowering users to create a system tailored to their study preferences.

Downloading and Printing Your Free Bible Tabs (PDF)
Locate reputable online sources offering free PDF Bible tab printables, ensuring quality and accuracy before printing on suitable paper for best results.
Finding Reputable PDF Sources
Navigating the internet for free printable Bible tabs requires discernment. Prioritize websites known for providing reliable Christian resources and free printables. Look for sites with clear download links and previews of the tab designs.
Be cautious of sites with excessive advertisements or those requesting personal information before allowing a download. Money Wise Steward and other established blogs often offer well-designed, free PDF options.
Always scan downloaded files with antivirus software to protect your device. Checking user reviews or comments can also provide insights into the quality and safety of the source before proceeding with the download and printing process.
Printing Considerations: Paper Quality and Settings
Achieving durable and visually appealing Bible tabs hinges on proper printing. Opt for cardstock or heavier-weight paper instead of standard printer paper; this prevents tearing and ensures longevity.
Within your printer settings, select the highest quality print setting for vibrant colors and sharp lines. Ensure the PDF is scaled to 100% to maintain accurate tab sizes for your Bible’s pages.
A test print on plain paper is recommended before using cardstock, verifying size and alignment.
Ensuring Accurate Tab Size for Your Bible
Precise tab sizing is crucial for a neat and functional Bible organization system. Before printing, compare the PDF tab dimensions to your Bible’s page height.
Most printable templates are designed for standard Bible sizes, but variations exist. A test print, scaled to 100%, allows you to physically check the fit against your Bible’s pages.
Adjust scaling slightly if needed, prioritizing tabs that extend just beyond the page edge without excessive overhang.

Preparing and Applying Your Printable Bible Tabs
Carefully cut out each tab, choosing between scissors or a paper trimmer for precision. Select an appropriate adhesive—glue, tape, or labels—for secure application.
Cutting Techniques: Scissors vs. Paper Trimmer
When preparing your printable Bible tabs, the cutting method significantly impacts the final result. Traditional scissors are readily available and suitable for smaller batches, but achieving consistently straight edges can be challenging. A steady hand and sharp scissors are crucial to avoid jagged lines.
Conversely, a paper trimmer offers superior precision and efficiency, especially when dealing with a full set of 66 tabs. It ensures uniform size and clean cuts, saving time and effort. However, paper trimmers require a bit more setup and may not be ideal for intricate designs or very small tabs. Consider the volume and desired aesthetic when selecting your cutting tool.
Adhesive Options: Glue Sticks, Tape, and Labels

Securing your printable Bible tabs requires careful adhesive selection to prevent damage to delicate Bible pages. Glue sticks offer a relatively mess-free application, but ensure a quick-drying formula to minimize smudging. Double-sided tape provides a clean and instant bond, though some tapes may yellow over time.

Pre-cut adhesive labels are a convenient option, offering precise placement and minimal residue. However, consider the label’s adhesive strength; you want secure attachment without permanently adhering to the page. Test a small area first to confirm compatibility and avoid potential tearing.
Proper Tab Placement: Avoiding Damage to Pages
Protecting your Bible’s integrity is paramount when applying printable tabs. Gently lift the page corner before applying adhesive, avoiding excessive force that could cause tearing. Position tabs neatly along the page edge, ensuring they don’t extend into the text block.
Avoid applying adhesive directly onto the Bible’s spine, as this can weaken the binding. Use minimal adhesive to prevent bleed-through onto subsequent pages. Consider the paper weight of your tabs; thinner tabs are less likely to cause bulkiness or damage.

Bible Tab Placement Guide: A Book-by-Book Approach
A detailed PDF guide simplifies tab placement, offering a systematic method for marking all 66 books with color-coded tabs for easy navigation.
Utilizing a Placement Guide PDF
Employing a dedicated placement guide PDF is crucial for accurate and efficient Bible tab organization. These guides, readily available online, eliminate guesswork by providing precise starting points for each of the Bible’s 66 books. They often incorporate color-coding suggestions, enhancing visual organization and quick reference.
A well-designed PDF will detail exactly where to position the tab for each book, minimizing errors and ensuring a consistent look throughout your Bible. This is particularly helpful for books with similar names or those located close together. Downloadable guides empower even beginners to achieve a professionally organized scripture experience, saving time and frustration.
Organizing Tabs by Testament (Old & New)
A logical approach to Bible tab placement involves separating the Old and New Testaments. Begin by applying tabs to all Old Testament books, progressing sequentially from Genesis to Malachi. This creates a clear visual division within your Bible, simplifying navigation between these major sections.
Following the Old Testament, proceed with the New Testament, starting with Matthew and concluding with Revelation. Utilizing distinct color schemes for each testament further enhances organization. This method streamlines your study, allowing for focused exploration of either the Old or New Covenant narratives with ease.
Tips for Consistent and Accurate Placement
Precision is key when applying Bible tabs. Use a ruler to ensure consistent tab height and alignment across all books. Start each book on a fresh page, placing the tab directly above the book’s title. A placement guide PDF is invaluable for accurate positioning, minimizing errors.
Double-check each tab before adhering it, confirming it aligns with the correct book. Avoid overcrowding; tabs should be neatly spaced. Consistent placement creates a visually appealing and highly functional Bible, maximizing its usability for study and reflection.

Creative Ways to Use Bible Tabs
Beyond basic organization, tabs facilitate thematic study, verse highlighting, and tracking progress through scripture, enriching your personal devotional experience.
Color-Coding by Theme or Topic
Transform your Bible study with a vibrant color-coding system using your printable tabs! Assign specific colors to recurring themes like love, faith, forgiveness, or promises. For example, use pink for verses about grace, blue for passages concerning hope, and green for wisdom literature like Proverbs.
This visual cue instantly identifies relevant scriptures when researching a particular topic. You can also color-code by literary genre – perhaps red for prophecy, yellow for poetry, and orange for the Gospels. Consistent application makes finding related verses incredibly efficient, deepening your understanding and connection to the text.
Highlighting Favorite Verses with Tabs
Beyond organization, printable Bible tabs excel at marking verses that deeply resonate with you! Use a distinct color – perhaps gold or silver – to flag scriptures that offer comfort, inspiration, or guidance during specific life seasons. This creates a personalized collection of spiritual touchstones readily accessible whenever you need encouragement.
These marked verses become a personal devotional resource, offering quick access to passages that speak directly to your heart. It’s a beautiful way to build a stronger relationship with scripture and consistently revisit God’s promises.
Using Tabs for Bible Study Tracking
Printable Bible tabs become invaluable tools when actively engaged in Bible study! Assign different colors to represent specific themes – like faith, love, or forgiveness – as you encounter them throughout scripture. This visual system instantly reveals recurring motifs and deeper connections within the biblical narrative.
Alternatively, use tabs to mark verses related to a particular sermon series or study guide. This facilitates easy reference and reinforces learning. It’s a dynamic way to transform your Bible into a personalized study companion!