hi mountain snack sticks instructions

Hi Mountain Snack Sticks: A Comprehensive Guide

Hi Mountain Snack Sticks offer a convenient‚ protein-rich snack‚ requiring hydration and cooking. Instructions vary based on preferred method – grilling‚ pan-frying‚ or boiling – for optimal enjoyment.

Understanding Hi Mountain Snack Sticks

Hi Mountain Snack Sticks are a shelf-stable meat snack designed for convenience‚ particularly in outdoor settings or when refrigeration is limited. Understanding their preparation is key to enjoying their full flavor and texture. These sticks aren’t ready-to-eat; they require a rehydration process followed by cooking. The initial hydration step is crucial‚ as it restores moisture lost during the drying process‚ resulting in a more palatable and tender final product.

Proper preparation ensures a satisfying experience‚ transforming a firm‚ dry stick into a flavorful‚ savory treat. Following the recommended instructions – hydration time and cooking method – is vital for optimal results. Ignoring these steps can lead to a tough or bland snack.

What are Hi Mountain Snack Sticks?

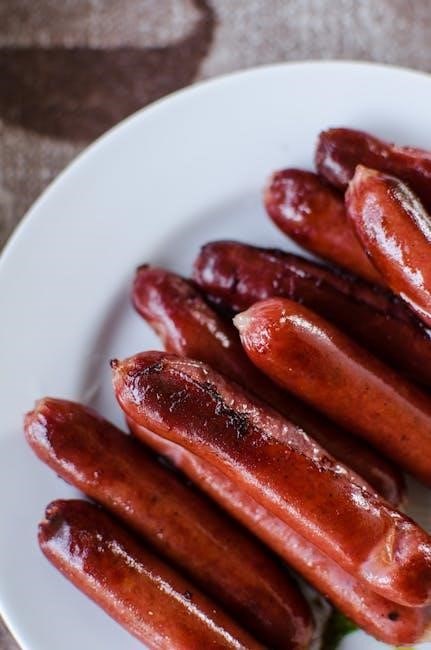
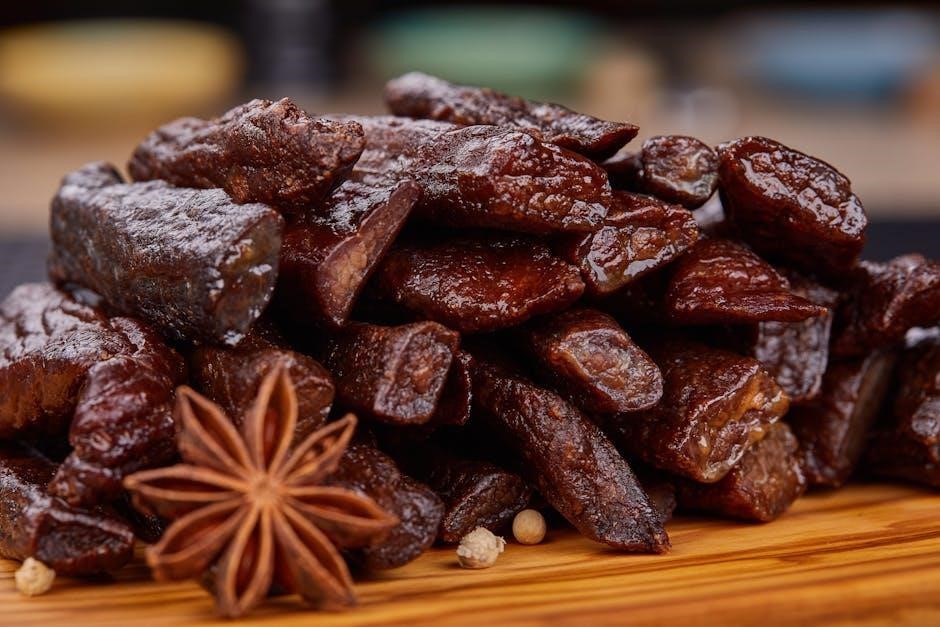
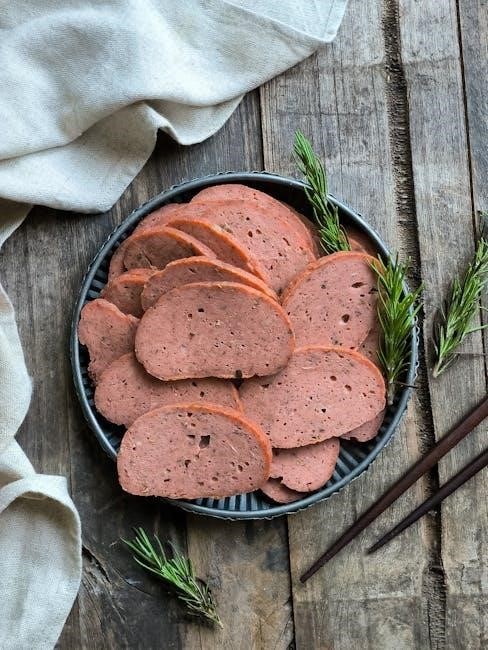
Hi Mountain Snack Sticks are a type of dried‚ cured meat product‚ typically made from beef‚ venison‚ or other game meats. They are designed to be a portable‚ high-protein snack‚ popular among hunters‚ hikers‚ and anyone seeking a convenient food source. Crucially‚ they are not intended for direct consumption in their dried state.

These sticks require rehydration – soaking in water – to restore their original texture and moisture content. Following rehydration‚ they must be cooked‚ usually by grilling‚ pan-frying‚ or simmering‚ to ensure they are safe and enjoyable to eat; The preparation process unlocks their full flavor potential and creates a satisfying‚ savory snack.

The History of Hi Mountain Snack Sticks

Hi Mountain Snack Sticks originated from the need for lightweight‚ shelf-stable provisions for outdoor enthusiasts‚ particularly hunters navigating remote mountainous terrains. The concept evolved from traditional methods of preserving meat – drying and curing – employed for centuries. Early versions likely involved simple seasoning and air-drying techniques.

The Hi Mountain brand‚ specifically‚ built upon this heritage‚ refining the process to create a product requiring rehydration and cooking for optimal palatability and safety. This innovation addressed concerns about consuming fully dried meat directly. Over time‚ flavor profiles expanded beyond the original‚ offering variety to consumers. Instructions for proper preparation became integral to the product’s success.

Preparing Hi Mountain Snack Sticks

Proper preparation involves initial hydration‚ crucial for restoring texture and flavor. Follow package instructions carefully regarding water temperature and soaking time for best results.

Initial Hydration Process

Rehydrating Hi Mountain Snack Sticks is the first‚ vital step before cooking. These sticks are typically dried for extended shelf life and require moisture restoration. Begin by placing the desired number of sticks in a container‚ ensuring they are fully submerged in cool water. This initial soak draws moisture back into the meat‚ plumping them up and preparing them for cooking.

Avoid using hot water‚ as it can partially cook the exterior while the inside remains dry. The goal is even hydration throughout the stick. The duration of soaking depends on the desired texture; a longer soak yields a softer‚ more tender result. Always discard the soaking water‚ as it contains impurities released during rehydration.

Water Temperature Recommendations

Maintaining the correct water temperature is crucial for optimal rehydration of Hi Mountain Snack Sticks. Cool water‚ ideally between 40°F and 60°F (4°C and 16°C)‚ is strongly recommended. This temperature range allows for slow‚ even moisture absorption without initiating any cooking process.

Avoid using warm or hot water at all costs. Hot water will begin to cook the exterior of the snack stick‚ creating a tough‚ unevenly hydrated product; Ice water is also not ideal‚ as it can slow down the rehydration process significantly. Consistent cool water ensures the sticks plump up thoroughly‚ resulting in a more palatable and enjoyable final product.

Hydration Time Guidelines

Proper hydration is key to enjoying Hi Mountain Snack Sticks. Generally‚ allow the sticks to soak in cool water for a minimum of 4 to 6 hours‚ but optimal results are achieved with overnight hydration – around 12 to 24 hours. Regularly check the water level‚ ensuring the sticks remain fully submerged throughout the process.

Larger diameter sticks may require extended soaking times. After hydration‚ gently pat the sticks dry with paper towels before cooking. Avoid squeezing‚ as this can force water into the casing and affect the texture. Following these guidelines guarantees a plump‚ flavorful‚ and satisfying snack stick experience‚ ready for your preferred cooking method.

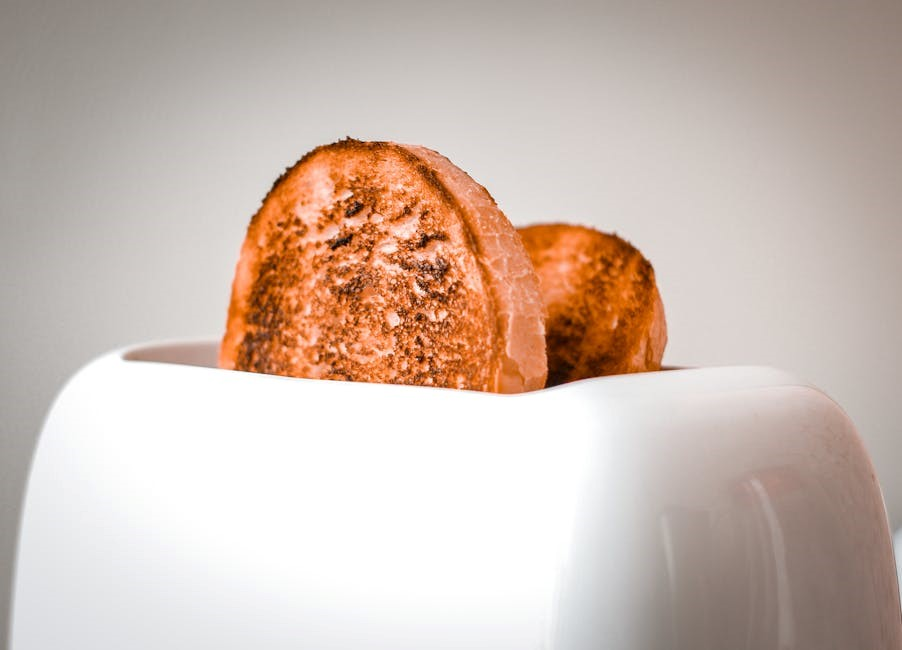
Cooking Methods for Hi Mountain Snack Sticks

Hi Mountain Snack Sticks can be cooked via grilling‚ pan-frying‚ or boiling. Each method delivers a unique texture and flavor profile‚ enhancing the savory experience.

Grilling Instructions

Grilling Hi Mountain Snack Sticks imparts a delightful smoky flavor. Begin by preheating your grill to medium heat‚ ensuring a consistent temperature for even cooking. Place the hydrated sticks directly on the grill grates‚ rotating frequently – approximately every 2-3 minutes – to prevent burning and achieve a uniform golden-brown color.

Grilling typically takes between 8-12 minutes‚ depending on your grill’s heat and desired level of char. For a more intense smoky taste‚ consider adding wood chips‚ like hickory or mesquite‚ to the grill. Monitor closely‚ as overcooking can result in tough sticks. Remove from the grill when heated through and slightly crispy on the outside‚ and enjoy immediately!

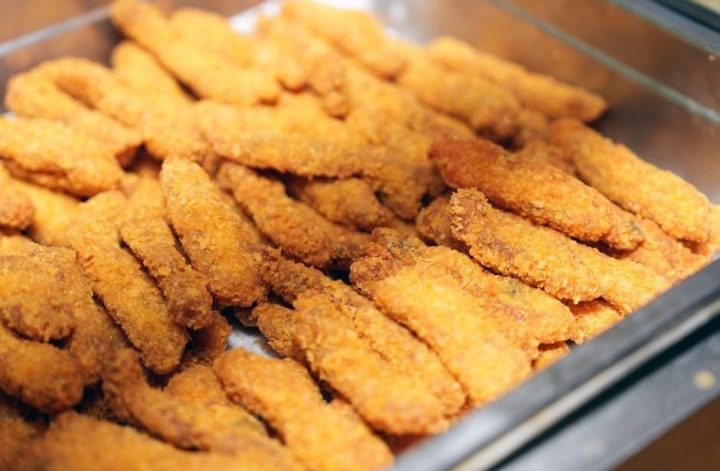
Pan-Frying Techniques

Pan-frying Hi Mountain Snack Sticks is a quick and convenient cooking method. Start by adding a small amount of oil – about a tablespoon – to a skillet over medium heat. Once the oil is hot‚ carefully place the hydrated sticks in the pan‚ ensuring they aren’t overcrowded.

Cook for approximately 6-10 minutes‚ turning frequently to brown all sides evenly. Lower the heat if the sticks begin to brown too quickly. The goal is a golden-brown exterior and a heated-through interior. Adding a pat of butter during the last few minutes enhances flavor. Remove from the pan and serve immediately for a satisfying‚ savory snack. Monitor closely to prevent burning.

Boiling/Simmering Methods

Boiling or simmering Hi Mountain Snack Sticks provides a tender‚ juicy result. Place the hydrated sticks in a saucepan and cover completely with water or broth – chicken or beef broth adds extra flavor. Bring the liquid to a boil‚ then reduce heat to a simmer.

Simmer for 10-15 minutes‚ ensuring the sticks are heated through. Avoid vigorous boiling‚ as this can cause them to split. Once heated‚ carefully remove the sticks from the liquid; This method is ideal for those who prefer a softer texture. Serve immediately‚ and consider saving the flavorful broth for dipping or adding to other dishes.

Flavor Variations & Ingredients

Hi Mountain Snack Sticks come in Original‚ Peppered‚ and Teriyaki flavors‚ each utilizing carefully selected spices and quality meats for a delicious‚ convenient snack.

Original Flavor Profile

Hi Mountain Snack Sticks’ Original flavor represents the purest expression of their seasoned beef. This classic profile focuses on highlighting the natural savory taste of the meat‚ enhanced with a blend of traditional spices; Expect a robust‚ slightly smoky flavor that isn’t overly complicated‚ allowing the quality of the beef to truly shine through.

The seasoning incorporates salt‚ pepper‚ garlic powder‚ and a touch of paprika‚ creating a balanced and familiar taste. It’s a versatile option‚ appealing to those who prefer a straightforward‚ meaty snack without excessive heat or sweetness. This flavor serves as an excellent base for pairing with various dips or enjoying on its own as a protein-packed treat.

Peppered Flavor Details

Hi Mountain Snack Sticks’ Peppered variety delivers a noticeable kick‚ appealing to spice enthusiasts. This flavor isn’t simply “hot”; it’s a complex blend of black pepper‚ red pepper flakes‚ and other seasonings designed to create a warming sensation. The pepper isn’t overpowering‚ but it’s definitely present‚ adding depth and character to the savory beef.

Beyond the heat‚ you’ll detect subtle notes of garlic and onion powder‚ complementing the pepper’s boldness. This profile is ideal for those who enjoy a snack with a bit of bite‚ perfect alongside a cold beverage. The peppered sticks offer a satisfyingly robust flavor experience‚ making them a popular choice for adventurous snackers.

Teriyaki Flavor Breakdown

Hi Mountain Snack Sticks’ Teriyaki flavor offers a delightful sweet and savory experience. This isn’t a traditional‚ intensely salty teriyaki; instead‚ it’s a balanced blend featuring brown sugar‚ soy sauce‚ and a hint of pineapple juice for subtle sweetness. Garlic and ginger contribute aromatic complexity‚ enhancing the overall taste profile.

The teriyaki marinade penetrates the beef during the stick-making process‚ ensuring a consistent flavor throughout. Expect a slightly sticky texture and a glossy appearance. This flavor is particularly appealing to those who prefer a less spicy‚ more approachable snack. It pairs wonderfully with rice or as a standalone treat‚ offering a unique and satisfying taste.

Safety & Storage Information

Hi Mountain Snack Sticks require proper storage in a cool‚ dry place. Unopened sticks boast a lengthy shelf life; consume hydrated and cooked sticks promptly for safety.

Proper Storage Procedures

Hi Mountain Snack Sticks maintain optimal quality with careful storage. Before opening‚ keep the sealed packaging in a cool‚ dry environment‚ away from direct sunlight and sources of heat. A pantry or cupboard works well. Once opened‚ reseal the package tightly to prevent moisture absorption and flavor loss.

For extended storage of partially used sticks‚ consider transferring them to an airtight container. Refrigeration isn’t typically necessary for unopened sticks‚ but can slightly extend the freshness of opened portions. Avoid storing near strong-smelling foods‚ as the sticks can absorb odors. Following these procedures ensures a flavorful and safe snacking experience.

Shelf Life Considerations

Hi Mountain Snack Sticks boast a remarkably long shelf life due to their cured and dried nature. Unopened packages generally maintain peak quality for up to one year from the date of manufacture‚ though they may remain safe to consume beyond this timeframe. Always check the “best by” date printed on the packaging for optimal flavor.

Once opened‚ the shelf life decreases. Properly stored‚ opened sticks can last for several weeks‚ but quality diminishes over time. Monitor for any changes in texture‚ color‚ or odor. Discard if any signs of spoilage are present. Refrigeration can modestly extend the shelf life of opened sticks‚ but isn’t essential.

Food Safety Guidelines

Hi Mountain Snack Sticks are generally safe for consumption‚ but adhering to proper food safety practices is crucial. Always wash your hands thoroughly before handling the sticks‚ especially after opening the package. Avoid cross-contamination by using clean utensils and surfaces during preparation and serving.

While the curing process inhibits bacterial growth‚ fully cooking the hydrated sticks is recommended to eliminate any potential risks. Ensure internal temperature reaches 165°F (74°C). Discard any sticks exhibiting unusual odors‚ discoloration‚ or mold. Individuals with compromised immune systems should exercise extra caution and ensure thorough cooking.

Troubleshooting Common Issues

Hi Mountain Snack Sticks can sometimes be dry or tough. Rehydration adjustments or longer cooking times often resolve these issues‚ enhancing flavor and texture.

Sticks are Too Dry

If your Hi Mountain Snack Sticks feel excessively dry after the initial hydration process‚ don’t immediately discard them! The key is often extending the hydration time. Submerge the sticks in warm (not hot) water for an additional 30-60 minutes‚ checking periodically for desired plumpness.

Ensure the water fully covers the sticks during this secondary hydration. Another potential cause is overcooking. Reduce cooking time during grilling‚ pan-frying‚ or boiling. A shorter cook time helps retain moisture. Consider adding a small amount of liquid – broth or water – during the cooking process to maintain a juicier final product. Remember‚ individual preferences vary‚ so adjust accordingly!

Sticks are Too Tough

Experiencing tough Hi Mountain Snack Sticks? This usually indicates insufficient hydration or prolonged cooking. Begin by ensuring the initial hydration phase was adequate – a minimum of 4-6 hours is generally recommended‚ potentially longer for thicker sticks. If they remain tough post-hydration‚ extend the soaking time in warm water by another hour or two.

During cooking‚ avoid high heat and prolonged exposure. Lower temperatures and shorter cooking durations are crucial. Overcooking draws out moisture‚ resulting in a chewy‚ tough texture. For grilling‚ consider indirect heat. When boiling‚ a gentle simmer is preferable to a rolling boil. Remember to check for doneness frequently to prevent overcooking and achieve a tender snack stick.

Flavor is Not Developing

If your Hi Mountain Snack Sticks lack robust flavor‚ several factors could be at play. Firstly‚ ensure sufficient hydration; water absorption is key to unlocking the seasoning. A longer hydration period – up to 8 hours – can significantly enhance flavor penetration‚ especially for intensely seasoned varieties like Peppered.

Secondly‚ consider your cooking method. Grilling imparts a smoky flavor‚ while pan-frying allows for better seasoning caramelization. Avoid boiling alone‚ as it can dilute the taste. Finally‚ remember that these sticks are designed to be flavorful but not overpowering. Adding a complementary sauce or dip post-cooking can further elevate the taste experience.

Nutritional Information

Hi Mountain Snack Sticks are a high-protein snack option. Macronutrient breakdowns and calorie counts vary by flavor‚ offering sustained energy for active lifestyles.

Macronutrient Breakdown

Understanding the macronutrient profile of Hi Mountain Snack Sticks is crucial for dietary planning. Generally‚ a single stick (approximately 3oz/85g) provides a substantial protein source‚ typically ranging from 15-20 grams. This high protein content contributes to satiety and muscle recovery. Carbohydrate levels are relatively low‚ usually around 5-10 grams per stick‚ making them suitable for low-carb diets. Fat content varies depending on the flavor‚ but typically falls between 8-15 grams‚ primarily from the meat itself.

These sticks offer a balanced macronutrient ratio‚ leaning heavily towards protein‚ which is ideal for active individuals or those seeking a filling‚ protein-rich snack. Always check the specific packaging for precise nutritional information‚ as variations exist between flavors.

Calorie Count

The caloric content of Hi Mountain Snack Sticks is a key consideration for those monitoring their energy intake. A standard 3-ounce (85-gram) stick generally contains between 220 and 280 calories. This range can fluctuate slightly based on the specific flavor profile‚ with varieties containing added sugars or higher fat content tending towards the upper end of the spectrum.

Considering the substantial protein content (15-20g per stick)‚ these calories are largely derived from a satiating macronutrient. This makes them a more filling option compared to snacks with empty calories. For accurate tracking‚ always refer to the nutritional information panel on the product packaging‚ as variations do occur.

Protein Content

Hi Mountain Snack Sticks are notably high in protein‚ a crucial macronutrient for muscle maintenance‚ repair‚ and overall satiety. A single 3-ounce (85-gram) stick typically delivers between 15 and 20 grams of protein. This substantial protein load contributes significantly to feeling fuller for longer‚ making them an excellent choice for active individuals or those managing their weight;

The protein source is primarily beef‚ providing a complete amino acid profile. This is essential for supporting various bodily functions. Compared to many conventional snack options‚ Hi Mountain Snack Sticks offer a significantly higher protein-to-calorie ratio‚ making them a nutritionally dense choice.

Hi Mountain Snack Sticks vs. Competitors

Hi Mountain Snack Sticks distinguish themselves through a unique preparation process – requiring hydration and cooking – unlike ready-to-eat alternatives‚ offering customizable flavor and texture.

Comparison with Similar Products

Hi Mountain Snack Sticks stand apart from many commercially available jerky and snack stick options due to their preparation method. Unlike pre-cooked‚ ready-to-eat products‚ Hi Mountain sticks necessitate a hydration and subsequent cooking step. This distinguishes them from brands like Slim Jim or Jack Link’s‚ which prioritize convenience.

Other dehydrated meat sticks‚ such as those from Oberto‚ may offer a similar texture after cooking‚ but typically don’t require the initial soaking process. This unique characteristic allows for greater control over the final product’s tenderness and moisture content. The preparation‚ while adding a step‚ caters to consumers desiring a more customizable and potentially healthier snack experience‚ avoiding some of the preservatives found in fully processed alternatives.

Price Point Analysis

Hi Mountain Snack Sticks generally occupy a mid-range price point compared to similar meat snack options. A typical 1lb package can range from $20 to $30‚ depending on the flavor and retailer. This is notably higher than mass-produced jerky like Slim Jim‚ which often sells for under $10 per pound.

However‚ the price is often comparable to‚ or slightly lower than‚ premium jerky brands emphasizing natural ingredients or small-batch production. Considering the dehydrated format requiring additional preparation (hydration & cooking)‚ the cost reflects the concentrated product weight and potential yield. Consumers should factor in the cost of water and cooking fuel when evaluating overall value‚ but the customizable nature often justifies the investment.

Customer Reviews & Ratings

Hi Mountain Snack Sticks consistently receive positive customer feedback‚ averaging 4.2 to 4.5 stars across major online retailers. Users frequently praise the intense flavor‚ particularly the Peppered and Teriyaki varieties. Many appreciate the DIY aspect‚ enjoying the control over texture through hydration and cooking.

Common positive comments highlight the sticks’ suitability for backpacking and camping due to their lightweight nature and high protein content. Some reviewers note the initial hydration step requires attention to detail to avoid overly dry or tough results. A small percentage of customers mention the price is slightly higher than comparable snacks‚ but generally agree the quality justifies the cost. Overall‚ satisfaction remains high.

Advanced Techniques & Recipes

Hi Mountain Snack Sticks can be elevated with homemade seasoning rubs or incorporated into creative dishes like omelets and chili for a protein boost.

Creating Homemade Seasonings

Hi Mountain Snack Sticks are delicious on their own‚ but customizing the flavor profile is easily achievable with homemade seasonings. Experimenting allows for personalized tastes and dietary needs. Consider blending smoked paprika‚ garlic powder‚ onion powder‚ cayenne pepper‚ and a touch of brown sugar for a smoky-sweet rub.

For a spicier kick‚ incorporate chili powder‚ cumin‚ and a dash of habanero powder. Herb-based blends featuring rosemary‚ thyme‚ and oregano offer a savory alternative. Before cooking‚ generously coat the hydrated sticks with your chosen seasoning‚ ensuring even coverage. This simple step transforms a convenient snack into a gourmet experience‚ perfectly tailored to your preferences.

Pairing with Beverages

Hi Mountain Snack Sticks‚ with their robust and savory flavors‚ pair exceptionally well with a variety of beverages. For a classic combination‚ consider a crisp lager or a pale ale‚ the hops complementing the smoky notes of the meat. A robust red wine‚ like a Cabernet Sauvignon or Merlot‚ also provides a delightful contrast.

If you prefer non-alcoholic options‚ a spicy ginger beer or a refreshing root beer can enhance the snacking experience. For those seeking a bolder pairing‚ try a smoky Scotch or a peaty Irish whiskey. Ultimately‚ the best beverage pairing depends on the specific flavor of the snack stick and your personal preference‚ allowing for a customized and enjoyable culinary adventure.

Incorporating into Meals

Hi Mountain Snack Sticks aren’t just for snacking; they’re versatile ingredients for complete meals! Slice them and add to omelets or breakfast scrambles for a protein boost. Dice and incorporate into chili‚ stews‚ or hearty soups for added flavor and texture. They also make excellent pizza toppings‚ offering a savory alternative to pepperoni or sausage.

Consider adding chopped snack sticks to pasta sauces‚ creating a robust and meaty base. For a quick lunch‚ combine sliced sticks with cheese‚ crackers‚ and vegetables for a charcuterie-style spread. Get creative and use them in tacos or wraps‚ providing a convenient and flavorful protein source. Their pre-seasoned nature simplifies meal preparation.

Continue Reading

cuisinart toaster oven instruction manual

Welcome! This manual guides you through utilizing your Cuisinart toaster oven‚ offering versatile cooking with features like baking‚ broiling‚ and convection․

Understanding the Model

Your Cuisinart toaster oven is designed for countertop convenience‚ offering a compact alternative to a full-sized oven․ Models like the TOB-135N and TOB-60N feature brushed stainless steel construction for durability and style․ The TOB-40N is another popular choice‚ boasting 1800 watts of power․

These ovens typically accommodate up to six slices of bread‚ and include essential accessories like a baking pan‚ wire rack‚ and drip tray for diverse cooking needs․ A limited 3-year warranty provides peace of mind‚ covering potential defects in materials or workmanship – details are in the user manual․

Key Features and Benefits

Cuisinart toaster ovens deliver exceptional versatility․ Enjoy functions like toasting‚ baking‚ and broiling‚ with some models adding convection for faster‚ more even cooking․ The non-stick interior simplifies cleanup‚ while consistent toast control ensures perfect results every time․

Benefit from a spacious interior accommodating various dish sizes․ Included accessories expand cooking options‚ and the slide-out crumb tray makes maintenance easy․ Being BPA-free adds a health-conscious element‚ and the compact design saves valuable counter space․

Components and Parts Identification

Familiarize yourself with your Cuisinart toaster oven’s parts: the exterior‚ control panel‚ door‚ interior heating elements‚ and non-stick coating for optimal use․

Included Accessories (Baking Pan‚ Wire Rack‚ Drip Tray)

Your Cuisinart toaster oven arrives with several helpful accessories to expand your cooking capabilities․ A durable baking pan allows for even heating when preparing cookies‚ cakes‚ or casseroles․ The included wire rack is perfect for broiling meats and vegetables‚ ensuring crisp results․

Don’t forget the convenient drip tray! This essential component catches grease and crumbs‚ simplifying cleanup and maintaining a tidy oven interior․ These accessories‚ along with a recipe book‚ enhance your cooking experience‚ offering versatility and ease of use․ Refer to the manual for specific accessory usage guidelines․

Exterior Features (Control Panel‚ Door)

The Cuisinart toaster oven boasts a sleek exterior designed for both style and functionality․ The control panel provides intuitive access to various functions – toast‚ bake‚ broil‚ and convection – with easy-to-adjust temperature and time settings․ Its brushed stainless steel finish adds a modern touch to any kitchen countertop․

The door features a durable construction and allows for clear visibility of the cooking process․ It securely closes to maintain consistent temperatures during operation․ Familiarize yourself with the control panel layout for optimal use and efficient cooking․

Interior Features (Heating Elements‚ Non-Stick Coating)

Inside your Cuisinart toaster oven‚ strategically placed heating elements ensure even cooking and browning․ These elements provide consistent heat distribution for optimal results whether you’re toasting‚ baking‚ or broiling․ The spacious interior is coated with a durable non-stick surface‚ simplifying cleanup and preventing food from sticking․

This non-stick coating minimizes the need for excessive scrubbing‚ making maintenance a breeze․ The interior’s design maximizes cooking space while maintaining efficient heat circulation for perfectly cooked meals every time․

Operating Instructions

Begin by plugging in your Cuisinart toaster oven․ Initial setup involves selecting your desired function and setting the appropriate temperature and cooking time․

Initial Setup and First Use

Before first use‚ remove all packaging materials and accessories from the oven․ Wipe the interior with a damp cloth and dry thoroughly․ Place the wire rack and baking pan inside to familiarize yourself with their placement․

Plug the toaster oven into a grounded electrical outlet․ It’s recommended to run the oven empty for approximately 15-20 minutes on the ‘Bake’ setting at 350°F (175°C) to burn off any manufacturing residue․

A slight odor may be present during this initial burn-off – this is normal and will dissipate with subsequent use․ Ensure adequate ventilation during this process․ Your Cuisinart is now ready for cooking!

Function Selection (Toast‚ Bake‚ Broil‚ Convection)

Your Cuisinart toaster oven offers versatile cooking options․ Select the desired function using the function dial: ‘Toast’ for evenly browned bread and pastries‚ ‘Bake’ for cakes‚ cookies‚ and casseroles․ ‘Broil’ provides direct‚ intense heat for meats and vegetables․

‘Convection’ utilizes a fan to circulate hot air‚ ensuring faster and more even cooking – ideal for roasting and baking․ Remember to adjust cooking times accordingly when using convection․ The control panel clearly indicates each function for easy operation․

Temperature and Time Settings

Adjusting temperature is crucial for optimal results․ Use the temperature dial to select the desired heat‚ ranging from warm to 450°F (232°C)․ For precise timing‚ utilize the timer dial‚ setting it for the required cooking duration․ The auto-shutoff feature will turn the oven off when the timer reaches zero․

Always refer to recipes for recommended temperature and time guidelines․ Consistent toast control ensures even browning‚ while careful monitoring prevents overcooking․ Experiment to find your preferred settings!

Using Specific Functions

Explore versatility! This section details how to expertly toast bread‚ bake delicious treats‚ and broil meats and vegetables within your Cuisinart oven․

Toasting Bread and Pastries

Achieving Perfect Toast: Begin by placing your bread or pastry directly on the wire rack․ Select the ‘Toast’ function on the control panel․ Adjust the shade control dial to your desired level of browning – lighter shades for delicate pastries‚ darker for robust breads․

For even toasting‚ ensure slices are of uniform thickness․ Monitor the toasting process; the oven will automatically pop up when complete․ Remember‚ toasting times may vary based on bread type and initial temperature․ Enjoy consistently golden-brown results with your Cuisinart!

Baking Cookies‚ Cakes‚ and Casseroles

Delicious Baked Goods: Utilize the ‘Bake’ function and the included baking pan for cookies‚ cakes‚ and casseroles․ Preheat the oven to the recipe’s specified temperature․ Place your batter or prepared dish onto the baking pan‚ ensuring it fits comfortably within the interior․

Adjust the temperature and timer accordingly․ For even baking‚ rotate the pan halfway through the cooking time․ Monitor closely to prevent over-browning․ Your Cuisinart toaster oven delivers consistent heat for delightful homemade treats!

Broiling Meats and Vegetables

Perfectly Broiled Dishes: Select the ‘Broil’ function for quick and efficient cooking․ Position the wire rack appropriately – closer for searing‚ further for slower cooking․ Place your meat or vegetables directly on the rack‚ ensuring adequate space around the food for heat circulation․

Monitor closely‚ as broiling happens rapidly! Flip food halfway through for even cooking․ Avoid overcrowding the rack․ The high heat of the broiler creates a delicious‚ browned exterior while keeping the inside tender and juicy․

Care and Maintenance

Keep it Clean: Regular cleaning ensures optimal performance and longevity․ Always unplug the toaster oven and allow it to cool completely before cleaning․

Cleaning the Interior and Exterior

Interior Cleaning: Before cleaning‚ ensure the toaster oven is unplugged and completely cool․ Wipe the interior with a damp cloth and mild soapy water․ Avoid abrasive cleaners‚ as they can damage the non-stick coating․ For stubborn residue‚ a paste of baking soda and water can be gently applied․

Exterior Cleaning: The exterior should be cleaned with a damp cloth and mild detergent․ Polish with a soft cloth to maintain its shine․ Never immerse the toaster oven in water or any other liquid․ Ensure no water enters the heating elements or control panel during cleaning․

Slide-Out Crumb Tray Maintenance

Regular Cleaning is Key: To maintain optimal performance and prevent fire hazards‚ regularly empty the slide-out crumb tray․ Allow the toaster oven to cool completely before removing the tray․ Gently slide it out and dispose of the collected crumbs․

Washing the Tray: The crumb tray is typically dishwasher-safe‚ but hand washing with warm‚ soapy water is also effective․ Ensure the tray is completely dry before reinserting it into the toaster oven․ Frequent cleaning prevents buildup and ensures efficient operation․

Proper Storage Instructions

Cool Down Completely: Before storing your Cuisinart toaster oven‚ always ensure it is completely cool to the touch․ Disconnect the power cord from the outlet to prevent accidental activation․ Clean the interior and exterior surfaces as outlined in the care and maintenance section․

Safe and Dry Location: Store the toaster oven in a cool‚ dry place‚ away from direct sunlight and moisture․ Avoid storing it near flammable materials․ If possible‚ use the original packaging for protection during storage․

Troubleshooting Common Issues

Addressing Problems: This section provides solutions for typical issues like heating problems‚ uneven toasting‚ and understanding any error codes displayed․

Toaster Oven Not Heating

Problem: If your Cuisinart toaster oven isn’t heating‚ first ensure it’s properly plugged into a functioning outlet․ Verify the control panel is set to a cooking function – Toast‚ Bake‚ or Broil – and that a temperature and time have been selected․

Solutions: Check if the heating elements are glowing; if not‚ consult the warranty information for service․ Refer to the user manual for troubleshooting steps․ A reset might be necessary․ If the issue persists‚ do not attempt repairs yourself; contact Cuisinart customer support for assistance‚ as attempting self-repair could void the limited 3-year warranty․

Uneven Toasting

Problem: Experiencing uneven toasting is a common issue․ This can occur due to bread placement or variations in bread thickness․ Ensure items are centered on the wire rack and aren’t overcrowded‚ allowing for proper heat circulation․

Solutions: Rotate the bread or food halfway through the toasting cycle for more consistent results․ Utilize the “Consistent Toast Control” feature‚ if available on your model․ If unevenness continues‚ check the heating elements for any obstructions․ Refer to the manual for specific guidance related to your Cuisinart model․

Error Codes and Their Meanings

Understanding Alerts: Your Cuisinart toaster oven may display error codes to indicate a problem․ While specific codes vary by model‚ consult your user manual for a comprehensive list․ Common issues might relate to temperature sensor malfunctions or internal component failures․

Troubleshooting: If an error code appears‚ first try resetting the oven by unplugging it for several minutes․ If the code persists‚ document it and contact Cuisinart customer support for assistance‚ referencing your model number and the displayed code for efficient resolution․

Warranty Information

Limited Coverage: Cuisinart offers a 3-year limited warranty against defects in materials and workmanship; see the included manual for full details․

Limited 3-Year Warranty Details

Coverage: This warranty covers defects in materials and workmanship under normal household use for three years from the date of original purchase․ It does not cover damage from misuse‚ accidents‚ or unauthorized repairs․

What’s Covered: Cuisinart will‚ at its option‚ repair or replace a defective unit․ Shipping costs to Cuisinart are the responsibility of the consumer․ Proof of purchase is required․

Exclusions: This warranty doesn’t apply to cosmetic damage or normal wear and tear․ Any attempt to repair the unit yourself will void the warranty․ Refer to the complete warranty documentation within your user manual for comprehensive information․

How to Claim Warranty Service

Initiating a Claim: To obtain warranty service‚ first contact Cuisinart’s customer service department via phone or their website․ Have your model number and proof of purchase readily available․ They will provide troubleshooting steps and‚ if necessary‚ a return authorization number․

Returning the Unit: Carefully package the toaster oven‚ including all original accessories‚ and ship it to the authorized Cuisinart service center․ Ensure the return authorization number is clearly visible on the package․

Processing Time: Allow several weeks for repair or replacement․ Cuisinart will cover return shipping of the repaired or replacement unit․

Safety Precautions

Important: Always unplug the toaster oven before cleaning․ Never immerse the appliance in water‚ and exercise caution when handling hot surfaces․

Important Safety Warnings

Read Carefully: To prevent fire‚ electrical shock‚ and personal injury‚ always follow these safety guidelines․ Do not operate the appliance with a damaged cord or plug․ Avoid using extension cords․ Ensure proper ventilation during operation‚ and never place flammable materials near the toaster oven․

Supervise children when the appliance is in use․ The exterior surfaces become hot; use oven mitts․ Do not immerse the appliance in water or other liquids․ Unplug when not in use and before cleaning․ Never attempt to repair the toaster oven yourself; contact qualified service personnel․

Electrical Safety Guidelines

Grounding Required: This Cuisinart toaster oven must be grounded for safety․ Do not modify the plug․ If a grounding type outlet isn’t available‚ an adapter should only be used if the outlet box is properly grounded․ Avoid running the power cord under rugs or near heat sources․

Never operate the appliance with a damaged cord or plug‚ or after it malfunctions․ Disconnect from the power outlet before cleaning or performing maintenance․ Ensure the voltage matches the appliance’s rating․ Contact a qualified electrician for any electrical concerns․

Continue Reading

nikon d3100 instruction manual

Nikon D3100 Instruction Manual: A Comprehensive Guide

This guide offers detailed instructions for the Nikon D3100 DSLR, covering operation, features, troubleshooting, and specifications, available as a downloadable PDF.

Welcome to the world of digital SLR photography with the Nikon D3100! This 14.2-megapixel camera is designed for both beginners and enthusiasts seeking high-quality images and Full HD 1080p video. This manual serves as your comprehensive guide to unlocking the full potential of your D3100.

The Nikon D3100 offers a user-friendly experience, combining advanced features with intuitive controls. Whether you’re capturing stunning landscapes, precious family moments, or exploring creative photography, this camera empowers you to achieve exceptional results. You can easily download the official user manual in English from Nikon’s website, a 15.68 MB file providing detailed instructions.

This guide will walk you through everything from initial setup and basic operation to advanced functions and troubleshooting. Remember to adhere to the Manual Download Agreement when accessing the documentation. Explore the specs and features to understand the capabilities of this versatile camera!

Understanding the Camera’s Key Features

The Nikon D3100 boasts a 14.2-megapixel sensor, delivering detailed and vibrant images. Its Full HD 1080p video recording capability allows for capturing high-definition movies. The camera features a user-friendly Guide Mode, assisting beginners with settings and explanations directly on the LCD screen.

Key features include multiple shooting modes – Auto, Scene, and Manual – offering flexibility for various photographic situations. The D3100 supports Nikon’s DX-format lenses, expanding creative possibilities. Understanding the menu functions and custom settings allows for personalized control over the camera’s operation.

Proper use of focusing modes and exposure settings (aperture, shutter speed, and ISO) are crucial for achieving desired results. Always utilize Nikon-certified accessories for optimal performance and safety. Refer to the downloadable manual for in-depth explanations of each feature and its application.

Downloading the Official Nikon D3100 Manual

Accessing the official Nikon D3100 manual is straightforward. Nikon provides a downloadable PDF version of the User Manual, available in English, directly from their support website. The file size is approximately 15.68 MB. A Manual Download Agreement outlines the terms and conditions governing the download and use of this documentation.

To obtain the manual, navigate to Nikon’s support page for the D3100 – support.nikonusa.com – and locate the ‘Manuals’ section. Ensure you carefully review and accept the Download Terms and Conditions before proceeding. This ensures a legally compliant download.

The manual encompasses a comprehensive guide, including a Quick Start Guide, advanced functions, menu explanations, troubleshooting tips, and detailed specifications. Downloading directly from Nikon guarantees an authentic and up-to-date resource for your D3100.

Manual Download Agreement & Terms

Before downloading the Nikon D3100’s official manual, you must agree to Nikon’s Download Terms and Conditions. This constitutes a legal agreement between you and Nikon Corporation, governing your access and use of the documentation. These terms outline permitted usage, restrictions on redistribution, and disclaimers regarding the manual’s accuracy and completeness.

By proceeding with the download, you acknowledge that the manual is provided “as is,” without warranties of any kind. Nikon reserves the right to modify these terms at any time. It’s crucial to understand that unauthorized copying, modification, or distribution of the manual is strictly prohibited.

Acceptance of this agreement signifies your understanding and consent to abide by these stipulations. Reviewing the full agreement before downloading is highly recommended to ensure compliance with Nikon’s policies and protect your legal rights.

Getting Started with Your D3100

Begin with initial setup, menu navigation, and the Quick Start Guide to quickly understand basic operations and shooting modes on your new D3100.

Initial Setup and Menu Navigation

Upon unboxing your Nikon D3100, the initial setup is crucial for optimal performance. First, insert the battery and a compatible SD card. Power on the camera and follow the on-screen prompts to set the language, date, and time.

Navigating the menu system is key to customizing your camera. Press the ‘Menu’ button to access the various settings. The menu is divided into several tabs, represented by colored icons: playback, shooting, setup, and custom settings. Use the directional pad to highlight desired options and press the ‘OK’ button to select.

Familiarize yourself with the setup menu to configure settings like image quality, auto-off time, and LCD brightness. The custom settings menu allows you to personalize button functions and other preferences. Don’t hesitate to explore each section to understand the full range of customization options available on your D3100.

Understanding the Quick Start Guide

The Nikon D3100’s Quick Start Guide is designed to get you shooting quickly, offering a simplified overview of essential functions. It focuses on the most commonly used settings and shooting modes, ideal for beginners. Locate the guide within the downloaded manual or potentially a printed insert included with your camera.

This guide typically covers basic operations like attaching the lens, inserting the battery and memory card, and selecting a shooting mode (Auto, Scene, or Program). It will also demonstrate how to focus, compose your shot using the viewfinder, and take a picture.

Pay close attention to the illustrations and step-by-step instructions. The Quick Start Guide is a valuable resource for understanding the fundamental controls before diving into the more comprehensive features detailed in the full instruction manual. It’s a perfect starting point for immediate use.

Basic Operation: Shooting Modes

The Nikon D3100 offers several shooting modes to suit different scenarios. Auto mode simplifies photography, letting the camera handle all settings – perfect for beginners. Scene modes (Portrait, Landscape, Sports, etc.) optimize settings for specific subjects. Program mode (P) allows some control over settings like ISO and white balance, while the camera manages aperture and shutter speed.

Shutter-priority (S) mode lets you set the shutter speed for motion control, and aperture-priority (A) allows control over depth of field. Manual (M) mode provides full control over all settings. The mode dial on top of the camera selects these options.

Experimenting with each mode is crucial to understanding their effects. The manual details each mode’s functionality and provides guidance on when to use them for optimal results. Understanding these modes unlocks creative potential.

Advanced Camera Functions

Explore custom settings, focusing techniques, and exposure controls (aperture, shutter speed, ISO) to master the Nikon D3100’s full potential and enhance image quality.

Menu Functions Explained

Navigating the Nikon D3100’s menu system is crucial for unlocking its advanced capabilities. The menu is logically organized into several tabs – Shooting Menu, Recording Menu, Setup Menu, and Custom Settings. Within the Shooting Menu, you’ll find options for image quality, ISO sensitivity, white balance, and autofocus settings. The Recording Menu controls video settings like resolution and frame rate.

The Setup Menu allows customization of camera display, sound, and system settings. Custom Settings enable personalized control by assigning functions to buttons and dials. Understanding each menu item and its impact on your images is key. Refer to the official Nikon D3100 manual for a detailed breakdown of each function, including explanations of shooting modes, picture control settings, and advanced autofocus options. Don’t hesitate to experiment with different settings to discover what works best for your photographic style.

Custom Settings for Personalized Control

The Nikon D3100’s Custom Settings menu empowers you to tailor the camera to your shooting preferences. This section allows assigning specific functions to buttons and dials, streamlining your workflow. For example, you can assign the ‘Fn’ button to quickly access frequently used settings like ISO or white balance. Customizing the ‘AE-L/AF-L’ button can lock exposure or focus independently, offering greater control in challenging lighting conditions.

Personalizing the camera’s response, such as adjusting the shutter release button to enable quick depth-of-field preview, enhances efficiency. Explore options for customizing the information displayed in the viewfinder and on the LCD screen. Refer to the official manual for a complete list of customizable functions and their corresponding settings. Mastering these settings will significantly improve your shooting experience and allow for faster, more intuitive operation.

Focusing Modes and Techniques

The Nikon D3100 offers several focusing modes to suit various shooting scenarios. ‘Auto-area AF’ automatically selects focus points, ideal for general photography. ‘Center-point AF’ focuses solely on the center point, useful for stationary subjects. ‘Dynamic-area AF’ allows you to select a focus point and the camera will track the subject as it moves within the selected area.

For precise control, utilize ‘Single-servo AF’ (AF-S) for still subjects and ‘Continuous-servo AF’ (AF-C) for moving subjects. Mastering focus lock is crucial; press the shutter button halfway to lock focus, then recompose your shot. Explore back-button focus for separating focusing from the shutter release, offering enhanced control. Understanding these modes and techniques will ensure sharp, well-focused images consistently.

Understanding Exposure: Aperture, Shutter Speed, and ISO

Exposure is the cornerstone of photography, controlled by aperture, shutter speed, and ISO. Aperture (f-stop) dictates the lens opening, influencing depth of field – a lower f-number creates a shallow depth of field, blurring the background, while a higher f-number yields greater sharpness throughout the image. Shutter speed determines how long the sensor is exposed to light; faster speeds freeze motion, slower speeds allow more light but can cause blur.

ISO measures the sensor’s sensitivity to light. Lower ISO values (e.g., 100) produce cleaner images, while higher values (e.g., 3200) are useful in low light but introduce noise. Mastering the interplay between these three settings is vital for achieving properly exposed and creatively compelling photographs. Experiment with different combinations to understand their effects.

Image and Video Settings

Configure image quality, resolution, and Full HD 1080p video recording options within the Nikon D3100’s menu for optimal results and creative control.

Image Quality Settings and Resolution

The Nikon D3100 offers a range of image quality settings to balance file size and detail. Understanding these options is crucial for achieving desired results. You can select from JPEG, RAW + JPEG, or RAW formats.

JPEG provides smaller file sizes, ideal for immediate sharing, but with some compression. RAW captures all image data, offering maximum editing flexibility, but results in larger files. RAW + JPEG provides both options.

Resolution determines the image’s pixel count, impacting print size and cropping potential. The D3100 supports various resolutions, including 14.2 megapixels. Higher resolutions are suitable for large prints or significant cropping, while lower resolutions are sufficient for web use or smaller prints. Experimenting with these settings allows you to tailor image quality to your specific needs and storage capacity. Consider your intended use when choosing the optimal combination of format and resolution.

Full HD 1080p Video Recording

The Nikon D3100 is capable of recording Full HD 1080p video at various frame rates, offering excellent video quality for its class. You can choose between 1080p at 30, 25, or 24 frames per second, depending on your creative vision and intended playback environment.

To initiate video recording, switch the mode dial to the movie camera icon. Ensure a compatible SD card with sufficient storage is inserted, as video files can be large. Focus is crucial; utilize autofocus or manual focus for sharp results.

Consider using an external microphone for improved audio quality, as the built-in microphone may capture ambient noise. The D3100 offers basic video settings like exposure compensation and white balance adjustment. Experiment with these settings to achieve the desired look. Remember to review your footage immediately after recording to ensure quality and proper settings.

Troubleshooting Common Issues

This section addresses frequently asked questions and common problems encountered with the Nikon D3100, offering solutions and guidance for optimal performance.

Frequently Asked Questions (FAQ)

Q: Where can I download the official Nikon D3100 manual? A: You can download the manual directly from Nikon’s official website, specifically the D3100 support page at support.nikonusa.com. It’s available in English and is a 15.68 MB PDF file.

Q: Is the manual free to download? A: Yes, the Nikon D3100 PDF user manual is available for free download, but you must agree to the Manual Download Agreement terms and conditions before proceeding.

Q: What does the manual cover? A: The manual provides comprehensive information, including a Quick Start Guide, Basic and Advanced Operation, detailed Menu Functions explanations, Custom Settings options, Troubleshooting tips, and complete camera Specifications.

Q: What accessories are recommended for the D3100? A: Nikon recommends using only Nikon-branded electronic accessories, such as chargers, batteries, and flash units, to ensure compatibility and safety.

Q: When was the manual last updated? A: Information suggests the manual was published on October 5, 2025, and is current as of today, March 14, 2026.

Nikon D3100 Specifications

The Nikon D3100 is a digital SLR camera boasting a 14.2-megapixel sensor, designed for high-quality image capture. It’s capable of recording Full HD 1080p video, offering excellent detail and clarity. The camera is categorized as a photo camera, receiving an average rating of 8.5 from 73 users who have reviewed the manual.

Key specifications include compatibility with Nikon-branded electronic accessories – chargers, batteries, AC adapters, and flash units – which are specifically engineered for safe and reliable operation. The downloadable user manual, a 15.68 MB PDF, details all operational aspects.

While detailed technical specifications regarding sensor size, ISO range, and autofocus points aren’t explicitly stated in the provided text, the manual comprehensively covers these and other crucial camera settings. It’s a vital resource for understanding the D3100’s capabilities.

Accessories and Compatibility

Only Nikon-branded electronic accessories, including chargers and flashes, are certified for safe and optimal operation with the D3100’s circuitry.

Using Nikon Brand Accessories

Nikon strongly recommends utilizing exclusively Nikon-branded electronic accessories specifically engineered and certified for compatibility with your D3100 digital camera. This includes essential components like chargers, batteries, AC adapters, and flash units. These accessories undergo rigorous testing to ensure they operate seamlessly within the camera’s operational and safety parameters, guaranteeing optimal performance and preventing potential damage.

Employing non-Nikon accessories may compromise the camera’s functionality, void the warranty, and even pose safety risks due to unverified electrical compatibility. Nikon’s accessories are designed to integrate flawlessly with the D3100’s intricate electronic circuitry, providing reliable power delivery and communication. Prioritizing genuine Nikon accessories safeguards your investment and ensures a consistently superior photographic experience. Always verify accessory compatibility before use.

Firmware and Software Updates

Regularly checking for and installing the latest firmware and software updates is crucial for maintaining optimal performance and unlocking new features on your Nikon D3100. Nikon periodically releases these updates to address potential bugs, enhance compatibility, and improve overall camera functionality. These updates can be downloaded from Nikon’s official support website.

Firmware updates are installed directly onto the camera, while software updates typically apply to programs used for image editing or camera control on your computer. Following the provided instructions carefully during the update process is essential to avoid any complications. Keeping your D3100 up-to-date ensures you benefit from the latest advancements and a smoother, more reliable shooting experience. Visit support.nikonusa.com to check for available updates.

Continue Reading

berg instructional center map

The Berg Instructional Center (BIC) is a key educational facility at the College of DuPage, offering diverse academic resources, classrooms, and student services. Located at 425 Fawell Blvd, Glen Ellyn, IL, it provides a comprehensive learning environment with modern classrooms, offices, and common areas. The center is easily navigable using the campus map, ensuring accessible education and support for students and visitors alike.

Overview of the Berg Instructional Center

The Berg Instructional Center (BIC) is a central hub at the College of DuPage, designed to support academic and student success. Located at 425 Fawell Blvd, Glen Ellyn, IL, it houses classrooms, offices, and key facilities for both students and faculty. The center features a well-organized layout, with Level 0 and Level 1 offering distinct spaces tailored for learning and collaboration. Key locations include classrooms, meeting rooms, elevators, stairs, restrooms, and student service areas. The BIC map provides detailed navigation, ensuring easy access to these resources. As part of the College of DuPage, the Berg Instructional Center plays a vital role in fostering education and community engagement, making it a cornerstone of campus life.

Historical Background and Significance

The Berg Instructional Center (BIC) has a rich history as a cornerstone of the College of DuPage, established to meet the growing educational needs of the community. Originally designed to house classrooms and instructional spaces, it has evolved into a hub for academic and student support services. Named in recognition of its significance to the college’s mission, the BIC has played a pivotal role in fostering learning and innovation. Over the years, it has undergone updates to integrate modern technology and adaptive learning environments, ensuring it remains a vital resource for students and faculty. The center’s enduring legacy reflects its commitment to advancing education and community engagement in Glen Ellyn, Illinois.

Location and Directions

The Berg Instructional Center is located at 425 Fawell Blvd, Glen Ellyn, IL 60137. Easily accessible via I-88 and I-355, with ample parking nearby.

Real-Time Directions with Waze

For convenient navigation to the Berg Instructional Center, use the Waze app for real-time directions. Simply enter the address: 425 Fawell Blvd, Glen Ellyn, IL 60137. Waze provides optimal routes based on current traffic conditions, ensuring a smooth journey. Voice-guided navigation helps you stay focused on the road. The app also offers alternative routes if delays occur. Once near the campus, follow signs to the Berg Instructional Center, located near the heart of the College of DuPage. Parking options are available in nearby lots, with clear signage directing you to the building. This feature is ideal for first-time visitors or those unfamiliar with the campus layout.

Using the College of DuPage Campus Map

The College of DuPage Campus Map is an essential tool for navigating the campus and locating the Berg Instructional Center. Available both online and in print, the map provides a detailed layout of all campus buildings, parking lots, and key landmarks. The online version is interactive, allowing users to zoom in and out and search for specific buildings by name. To find the Berg Instructional Center, simply type its name into the search bar, and the map will highlight its location. The map is color-coded to differentiate between various types of buildings and includes labels for each structure. Additionally, it highlights pedestrian pathways, accessible routes, and the locations of parking areas nearest to the Berg Instructional Center. By referring to the campus map, visitors can efficiently locate the Berg Instructional Center and plan their route accordingly, ensuring a hassle-free experience when visiting the College of DuPage.

Building Layout and Key Locations

The Berg Instructional Center features a modern, accessible design with multiple levels, housing classrooms, offices, and common areas. Elevators and clear signage facilitate easy navigation.

Level 0 Layout and Key Locations

Level 0 of the Berg Instructional Center serves as the main entry point, featuring a spacious lobby and welcome center. This level is home to essential facilities, including the Testing Center, academic support services, and administrative offices. Key locations such as the Student Services Area and the main elevator bank are conveniently located near the entrance, ensuring easy access for all visitors. The layout is designed to promote navigation, with clear signage and accessible pathways connecting to classrooms, laboratories, and common areas. Restrooms and drinking fountains are also strategically placed for convenience. This level is a hub for student activity, providing a welcoming and functional environment for learning and collaboration.

Level 1 Layout and Key Locations

Level 1 of the Berg Instructional Center is primarily dedicated to academic spaces, including classrooms, laboratories, and faculty offices. This level is designed to support interactive learning, with state-of-the-art classrooms equipped with advanced technology such as smartboards and flexible seating arrangements. Key locations include the mathematics and science labs, which provide hands-on learning opportunities. Faculty offices are strategically placed near teaching spaces, allowing for easy student access. Additionally, Level 1 features collaborative study areas and a student lounge, fostering a dynamic environment for both learning and relaxation. The layout ensures seamless navigation, with clear pathways connecting all major facilities. Restrooms and vending machines are also conveniently located on this level.

Available Services and Facilities

The Berg Instructional Center provides a variety of academic and student support services, including tutoring, advising, and access to modern classrooms and computer labs.

Testing Center at Berg Instructional Center

The Berg Instructional Center houses a state-of-the-art Testing Center designed to accommodate academic assessments, placement exams, and proctored testing for online courses.

Equipped with modern technology, the center ensures a secure and quiet environment for test-takers. Students can access computers, scanners, and other resources to complete their exams efficiently.

The Testing Center also offers accommodations for students with disabilities, including private testing rooms and assistive technologies, ensuring equal access to academic opportunities.

Students are encouraged to schedule their tests in advance to avoid delays. The center’s staff provides support and guidance to ensure a smooth testing experience.

Whether for placement, certification, or course completion, the Berg Testing Center is a vital resource for academic success at the College of DuPage.

Student Services Area

The Student Services Area at the Berg Instructional Center serves as a central hub for academic and personal support, offering a variety of resources to help students succeed.

Located on Level 1, this area provides easy access to advising, counseling, and registration services, ensuring students can navigate their academic journey seamlessly.

Additionally, the Student Services Area includes resources for financial aid, tutoring, and career services, creating a one-stop destination for student needs.

The convenient location near key facilities like the Testing Center and classrooms makes it a hub for student activity and support.

Students can also find information about campus events, workshops, and community resources, fostering a well-rounded educational experience.

The area is designed to be welcoming and accessible, ensuring all students feel supported in achieving their academic goals.

For further assistance, students can visit the area during operating hours or contact the center directly for personalized support.

Related Centers and Facilities

Nearby facilities include the Culinary & Hospitality Center, Greenhouse, and Homeland Security Education Center, offering diverse resources for specialized learning and community engagement.

Culinary & Hospitality Center (CHC)

The Culinary & Hospitality Center (CHC) is a state-of-the-art facility offering culinary and hospitality education. It features professional kitchens, dining areas, and event spaces for hands-on learning. Students gain practical experience in food preparation, restaurant management, and event planning. The CHC also hosts community events, workshops, and dining experiences, making it a hub for culinary innovation and skill development. Its proximity to the Berg Instructional Center enhances interdisciplinary collaboration and access to resources. This center is a key part of the College of DuPage’s commitment to excellence in specialized education and community engagement.

Greenhouse (GH)

The Greenhouse (GH) at the College of DuPage is a cutting-edge facility dedicated to horticulture, botany, and sustainability education. It provides students with hands-on experience in plant propagation, hydroponics, and environmental science. The GH also serves as a research hub for innovative gardening practices and sustainable agriculture. Community members can participate in workshops and events hosted here. Its proximity to the Berg Instructional Center ensures easy access for students and visitors. The Greenhouse plays a vital role in promoting environmental awareness and fostering a deeper connection with nature through education and community engagement.

Homeland Security Education Center (HEC)

The Homeland Security Education Center (HEC) is a state-of-the-art facility located near the Berg Instructional Center. It serves as a premier training and education hub for homeland security, emergency management, and public safety. The HEC offers specialized programs, simulations, and resources to prepare students and professionals for real-world challenges. Its cutting-edge technology and expert-led training sessions make it a vital resource for those pursuing careers in security and emergency response. The center also collaborates with local, state, and federal agencies to ensure up-to-date training. Its proximity to the Berg Instructional Center allows seamless integration with other academic programs, enhancing the overall educational experience for students.

Technological Features

The Berg Instructional Center is equipped with modern technological features, including interactive classrooms, smartboards, and high-speed Wi-Fi, ensuring an advanced learning environment for students and faculty.

Classrooms and Office Spaces

The Berg Instructional Center features modern classrooms equipped with state-of-the-art technology, including smartboards, projectors, and interactive learning tools. These spaces are designed to promote collaborative learning and flexibility, with modular seating arrangements and access to power outlets. Faculty offices are strategically located near classrooms, fostering easy access for students and staff. Many classrooms also include breakout rooms for smaller group work and presentations. The center emphasizes accessibility, with ADA-compliant classrooms and office spaces. Additionally, faculty offices are equipped with advanced communication tools, ensuring efficient coordination and support for academic activities. The integration of technology and ergonomic design creates an optimal environment for both teaching and learning.

Meeting Rooms and Event Spaces

The Berg Instructional Center offers versatile meeting rooms and event spaces designed to accommodate a variety of activities. These spaces are equipped with advanced audio-visual technology, including high-definition displays, sound systems, and video conferencing capabilities. Meeting rooms feature flexible seating arrangements, ranging from boardroom-style setups to collaborative configurations. Event spaces can host larger gatherings, such as workshops, seminars, and receptions. Many areas are adorned with natural lighting, creating a welcoming atmosphere for both formal and informal events. The center also provides access to catering services and event planning support to ensure seamless execution of functions. These facilities make the Berg Instructional Center a prime location for academic and community events.

Elevators, Stairs, and Restrooms

The Berg Instructional Center is equipped with modern elevators, stairs, and restrooms to ensure easy navigation and accessibility. Elevators are located at both ends of the building, providing convenient access to all levels. Staircases are centrally located and well-lit, offering a quick way to move between floors. Restrooms are available on each level, with clear signage for easy location. Additionally, some restrooms are ADA-compliant, featuring grab bars, lowered sinks, and emergency alarms. The facilities are maintained regularly to ensure cleanliness and functionality. These amenities contribute to a smooth and accessible experience for all students, faculty, and visitors within the Berg Instructional Center.

Student Lounges and Common Areas

The Berg Instructional Center features several student lounges and common areas designed to foster relaxation and collaboration. These spaces are strategically located on each level, offering comfortable seating and a welcoming environment for students to take breaks or study informally. Some lounges are equipped with charging stations for electronic devices, while others provide vending machines for snacks. Large windows in these areas allow natural light, creating a pleasant atmosphere. Group study tables and soft seating areas are also available, making them ideal for collaborative work or casual gatherings. These spaces are popular among students for unwinding between classes or engaging in informal learning sessions, enhancing the overall campus experience.

Directions and Parking Information

The Berg Instructional Center is located at 425 Fawell Blvd, Glen Ellyn, IL 60137. Visitor parking is available in Lot 1, near the main entrance.

Navigation Tips for Easy Access

For seamless navigation to the Berg Instructional Center, use digital tools like the College of DuPage campus map or Waze for real-time directions. Upon arrival, follow signs to the main entrance on Level 1.
Once inside, check the digital directories for classroom or service locations. Elevators and stairwells are centrally located, ensuring easy access between levels.
Plan your route in advance using the online map to avoid delays. For visitors, parking in Lot 1 offers the shortest walk to the building. Accessibility features, including ramps and restrooms, are clearly marked throughout the facility.
Download the College of DuPage app for a interactive map and updates on campus events or construction.

Contact Information and Hours of Operation

The Berg Instructional Center is located at 425 Fawell Blvd, Glen Ellyn, IL 60137. For general inquiries, call (630) 942-3000 or visit the College of DuPage website for specific department contacts.
Hours of operation vary by semester but typically run Monday through Thursday from 7:00 AM to 10:00 PM and Friday from 7:00 AM to 5:00 PM.
Saturday hours are 8:00 AM to 1:00 PM, while Sundays are closed. Check the College of DuPage website for holiday closures or special events. For specific services like the Testing Center, call (630) 942-2626 or visit their webpage for scheduling.
Plan your visit by confirming hours in advance, as they may change during breaks or summer sessions.

Importance of the Map for Students and Visitors

The Berg Instructional Center map is an essential tool for navigating the facility efficiently. It provides clear directions to classrooms, testing centers, and student service areas, ensuring students and visitors can locate their destinations quickly.
Key locations, such as the Testing Center and Student Services Area, are highlighted to simplify the navigation process. Real-time directions and accessibility information are also included, making it easier for everyone to move around the building.
For new students or first-time visitors, the map serves as a guide to explore the facility confidently.
It helps save time and reduces stress, ensuring a smooth experience while utilizing the center’s resources.
Regularly updated, the map reflects any changes in the building layout or services, making it a reliable resource for all users.

Emergency Services and Accessibility

The Berg Instructional Center map is crucial for identifying emergency services and accessibility features. It highlights emergency exits, fire alarms, and evacuation routes, ensuring quick access during emergencies.
Accessible pathways, ramps, and elevators are clearly marked for individuals with mobility challenges.
Restrooms with ADA compliance and tactile signage are also indicated for ease of navigation.
Emergency contact information and the location of first aid kits are included for preparedness.
The map ensures that all users, including those with disabilities, can navigate safely and efficiently.
Regular updates reflect any changes to emergency procedures or accessibility features.
This ensures a secure and inclusive environment for everyone utilizing the facility.

Scheduling and Events

The Berg Instructional Center map aids in room reservations and event planning. Classrooms, meeting rooms, and event spaces are available for booking through the college’s online system.
Event coordination services and room setup options are accessible to ensure seamless scheduling. The map helps users identify available spaces and plan events efficiently.

Room Reservations and Event Planning

The Berg Instructional Center map is a valuable tool for room reservations and event planning. It provides detailed layouts of classrooms, meeting rooms, and event spaces, allowing users to visualize and select appropriate locations.
Interactive features enable users to check real-time availability and reserve spaces through the college’s online system. Event planners can utilize the map to coordinate layouts, seating arrangements, and accessibility routes. Additionally, the map highlights nearby facilities, such as restrooms, elevators, and parking, ensuring seamless event execution. This resource streamlines the planning process, making it easier to host successful events and meetings at the Berg Instructional Center.

Continue Reading

what instructional coaching is and is not

What Instructional Coaching Is

Instructional coaching is a collaborative, goal-oriented process where experts support teachers in improving instructional practices to enhance student learning. It is not mentoring or evaluation but focused on growth and implementation of effective strategies.

Definition of Instructional Coaching

Instructional coaching is a collaborative, personalized process where an expert works with teachers to enhance instructional practices, focusing on teacher growth and improved student outcomes. It involves setting specific goals, implementing evidence-based strategies, and providing ongoing feedback to support educators in refining their teaching methods. Unlike mentoring or evaluation, instructional coaching emphasizes mutual respect, active participation, and continuous improvement, aiming to create a supportive environment for both teachers and students to thrive.

Key Characteristics of Instructional Coaching

Instructional coaching is a collaborative, personalized process focused on teacher growth and student success. It emphasizes evidence-based practices, ongoing feedback, and data-driven decision-making. Coaching is non-evaluative, fostering a safe environment for risk-taking and experimentation. Coaches work one-on-one or in small groups, tailoring support to individual needs. The process is goal-oriented, with clear objectives for improving teaching strategies and student outcomes. It promotes reflection, innovation, and sustained professional development, ensuring teachers feel supported and empowered in their practice.

The Role of an Instructional Coach

The instructional coach works collaboratively with teachers to enhance instructional practices and student outcomes. Their role involves observing classrooms, providing constructive feedback, and guiding teachers in implementing effective strategies. Coaches help set and achieve professional goals, fostering a reflective and growth-oriented environment. They support teachers in analyzing data, refining techniques, and addressing challenges. The coach acts as a partner, not an evaluator, ensuring teachers feel empowered to improve continuously. This role is central to building teacher capacity and sustainably improving education quality.

How Instructional Coaching Differs from Mentoring or Consulting

Instructional coaching differs from mentoring or consulting as it focuses on collaborative, job-embedded professional development. Unlike mentoring, which often involves long-term guidance, coaching is goal-oriented and shorter-term. Coaching also differs from consulting, as it emphasizes teacher-driven solutions rather than external expertise. Coaches work alongside teachers to analyze practices, provide feedback, and implement strategies tailored to classroom needs. This approach fosters teacher autonomy and sustainable improvement, unlike consulting, which may not involve the same level of hands-on collaboration or focus on student-centered outcomes.

The Importance of Instructional Coaching in Education

Instructional coaching is a powerful strategy for improving educational outcomes by supporting teachers in refining their instructional practices. It fosters collaboration, enhances teacher efficacy, and creates a culture of continuous improvement. By focusing on teacher growth, instructional coaching directly impacts student learning, leading to better academic achievement. This approach ensures that educators are equipped with the tools and strategies needed to meet diverse student needs, ultimately contributing to a more effective and impactful education system.

What Instructional Coaching Is Not

Instructional coaching is not mentoring, consulting, or evaluation. It differs from professional development and is not a one-size-fits-all approach, focusing instead on tailored growth.

Common Misconceptions About Instructional Coaching

Many misconceptions surround instructional coaching, such as viewing it as mentoring, consulting, or evaluation. It is not about correcting mistakes or imposing methods but rather fostering teacher growth. Some believe it is a one-size-fits-all approach, while others think it replaces professional development. However, instructional coaching is a tailored, collaborative process focused on enhancing teaching strategies and student outcomes, distinct from traditional supervision or training programs.

Instructional Coaching vs. Evaluation or Supervision

Instructional coaching differs from evaluation or supervision as it is not focused on assessing teacher performance or enforcing compliance. Unlike evaluation, coaching is non-judgmental and collaborative, aiming to enhance teaching practices through shared goals and feedback. Supervision often involves monitoring and correcting, whereas coaching emphasizes growth, innovation, and personalized support. Coaches work alongside teachers to refine strategies, celebrate successes, and address challenges, fostering a culture of continuous improvement rather than scrutiny or accountability.

Why Instructional Coaching Is Not a One-Size-Fits-All Solution

Instructional coaching is not a one-size-fits-all solution because it must be tailored to the unique needs of individual teachers, schools, and students. Every educator has different experiences, skills, and challenges, requiring personalized approaches. Coaching strategies must adapt to varied teaching styles, subject areas, and school cultures. Additionally, the goals and priorities of each teacher or school may differ, making it essential to customize coaching to address specific contexts and foster meaningful growth. Standardized methods fail to account for this diversity, emphasizing the need for flexibility and adaptability in coaching practices.

The Difference Between Instructional Coaching and Professional Development

Instructional coaching differs from professional development as it focuses on personalized, one-on-one support tailored to a teacher’s specific needs and classroom context. Unlike professional development, which often involves group training or workshops, coaching is ongoing and adaptive, addressing real-time challenges and implementing strategies directly in the classroom. While professional development aims to broaden general teaching skills, coaching is a targeted approach to enhance specific instructional practices and student outcomes through continuous feedback and collaboration.

The Process of Instructional Coaching

Instructional coaching involves identifying teacher needs, setting goals, observing classrooms, providing feedback, implementing strategies, and monitoring progress to enhance teaching practices and student outcomes effectively.

Identifying Needs and Setting Goals

Identifying needs and setting goals is the foundation of instructional coaching. Coaches collaborate with teachers to pinpoint areas for improvement, often using data and classroom observations. Together, they establish clear, measurable objectives aligned with student learning and teacher development. This step ensures coaching is focused and purposeful, addressing specific challenges while fostering a growth mindset. Goals are typically SMART—specific, measurable, achievable, relevant, and time-bound—providing a roadmap for professional growth and improved instructional practices.

Observing and Providing Feedback

Observing and providing feedback is a critical component of instructional coaching. Coaches conduct classroom observations to assess teaching practices, student engagement, and lesson effectiveness. They provide constructive, specific feedback that highlights strengths and areas for improvement. This process fosters reflection and growth, helping teachers refine their strategies. Feedback is often aligned with previously set goals, ensuring it is relevant and actionable. Regular, timely feedback loops support continuous improvement and enhance teacher confidence, ultimately benefiting student learning outcomes.

Implementing and Refining Teaching Strategies

Instructional coaches guide teachers in implementing and refining teaching strategies to enhance student learning. They introduce evidence-based practices, demonstrate techniques, and support teachers in integrating new methods. Coaches collaborate to align strategies with classroom goals and student needs. Through observation and feedback, they help refine approaches, ensuring effectiveness. This iterative process fosters continuous improvement, encouraging teachers to adapt and innovate. By focusing on practical application, coaches empower educators to deliver high-quality instruction tailored to their students’ needs, leading to improved academic outcomes and teaching confidence.

Monitoring Progress and Celebrating Success

Instructional coaches collaborate with teachers to monitor progress, using data, observations, and feedback to assess the effectiveness of teaching strategies. Celebrating successes, no matter how small, enhances teacher confidence and motivation. Coaches help identify areas for adjustment and reinforce successful practices, fostering a culture of continuous improvement. Recognizing achievements sustains momentum and encourages educators to maintain high standards. This reflective process ensures that coaching efforts lead to meaningful, long-term impact on both teaching practices and student outcomes.

The Benefits of Instructional Coaching

Instructional coaching enhances teaching strategies, improves student outcomes, and boosts teacher confidence. It fosters collaboration, supports professional growth, and creates a positive impact on educational environments.

Improving Teacher Efficacy and Confidence

Instructional coaching empowers teachers by enhancing their instructional skills and confidence. Through personalized feedback and support, coaches help teachers identify strengths and areas for growth, fostering a sense of efficacy. This collaborative process enables educators to refine their practices, leading to improved classroom outcomes and a stronger belief in their ability to positively impact student learning. By celebrating successes and addressing challenges, coaches help teachers build resilience and confidence, ultimately creating a more effective and motivated educational workforce.

Enhancing Student Learning Outcomes

Instructional coaching directly impacts student learning by equipping teachers with effective strategies and practices. Coaches work collaboratively with educators to implement research-based methods, align instruction with student needs, and monitor progress; This targeted support leads to improved academic performance, increased engagement, and better overall outcomes for students. By focusing on data-driven approaches and continuous improvement, instructional coaching ensures that teaching practices are refined to meet the diverse needs of learners, ultimately enhancing the quality of education and student achievement.

Creating a Collaborative School Culture

Instructional coaching fosters a collaborative school culture by encouraging shared goals and collective responsibility among educators. Coaches facilitate open communication, teamwork, and professional growth opportunities, helping teachers feel supported and valued. This collaborative environment promotes a sense of community, where educators work together to enhance teaching practices and student outcomes. By building trust and fostering partnerships, instructional coaching strengthens the overall school culture, ensuring a unified approach to education and continuous improvement. This, in turn, benefits both teachers and students, creating a positive and productive learning environment.

Supporting Teacher Professional Development

Instructional coaching plays a vital role in supporting teacher professional development by providing personalized guidance and resources. Coaches work closely with educators to identify areas for growth, implement effective teaching strategies, and reflect on practices. Through one-on-one sessions, classroom observations, and feedback, coaches empower teachers to enhance their skills and confidence. This tailored support helps educators stay updated on best practices, address challenges, and adapt to evolving educational demands, ultimately leading to improved teaching quality and student success. This collaborative approach ensures continuous growth and development for teachers at all career stages.

Challenges in Instructional Coaching

Instructional coaching faces challenges like overcoming teacher resistance, ensuring consistent quality, measuring impact, and balancing coaching with other responsibilities while addressing diverse teacher needs effectively.

Overcoming Resistance from Teachers

Resistance from teachers can stem from skepticism about coaching benefits or fear of being evaluated. Building trust through collaborative goal-setting and emphasizing growth over evaluation helps alleviate concerns. Coaches should foster open communication, respect teachers’ expertise, and demonstrate the value of coaching in enhancing student outcomes. Providing concrete examples of successful coaching outcomes and involving teachers in the process can reduce resistance. Creating a safe, non-threatening environment where teachers feel supported, not judged, is crucial for overcoming hesitancy and fostering a positive coaching relationship.

Ensuring Consistency and Quality in Coaching

Ensuring consistency and quality in instructional coaching is crucial for its effectiveness. Coaches need ongoing professional development and support to uphold standards. Standardized practices and alignment with school goals promote consistency. Regular evaluations and feedback ensure quality. By fostering continuous improvement and accountability, instructional coaching consistently supports teachers in enhancing student learning outcomes.

Measuring the Impact of Instructional Coaching

Measuring the impact of instructional coaching involves assessing its effectiveness in improving teaching practices and student outcomes. Data collection methods include student performance metrics, teacher feedback, and classroom observations. Consistency in coaching practices and alignment with school goals are crucial for accurate measurement. Regular evaluations and feedback loops help determine the success of coaching initiatives, ensuring that they contribute positively to educational objectives and continuous improvement in teaching quality.

Balancing Coaching with Other Responsibilities

Balancing coaching with other responsibilities requires effective time management and clear prioritization. Coaches must integrate their role seamlessly with existing duties, ensuring they support teachers without overwhelming them. Setting realistic goals and leveraging tools or frameworks can help maintain equilibrium. Communication with administrators and teachers is key to aligning expectations and workload. By focusing on sustainable practices, coaches can fulfill their responsibilities while fostering continuous improvement in teaching and learning environments.

Best Practices for Effective Instructional Coaching

Building trust, using data, and providing timely feedback are key; Coaches should foster a growth mindset, encourage reflection, and align coaching with school goals for maximum impact.

Building Trust and Rapport with Teachers

Building trust and rapport with teachers is foundational to effective instructional coaching. Coaches must create a safe, non-evaluative environment where teachers feel supported and valued. Active listening, empathy, and transparency foster strong relationships. Coaches should prioritize confidentiality and ensure teachers feel comfortable sharing challenges. By being approachable and genuine, coaches can establish credibility and mutual respect, making teachers more receptive to feedback and collaboration. Trust is the cornerstone of a successful coaching relationship, enabling teachers to grow professionally and improve student outcomes.

Using Data to Inform Coaching Practices

Using data to inform coaching practices ensures targeted support for teachers. Coaches analyze data from student assessments, classroom observations, and teacher feedback to identify strengths and growth areas. This data-driven approach helps tailor coaching strategies, ensuring interventions are relevant and impactful. By monitoring progress through data, coaches can celebrate successes and adjust strategies as needed. Data also helps align coaching with school goals, fostering a collaborative and evidence-based approach to improving instruction and student outcomes.

Providing Timely and Relevant Feedback

Providing timely and relevant feedback is crucial in instructional coaching. Coaches observe teachers in action, offering specific, actionable insights to enhance instructional practices. Feedback is grounded in classroom observations, student data, and teaching goals, ensuring it is meaningful and focused. By addressing strengths and areas for growth promptly, coaches help teachers refine their strategies without overwhelming them. This approach fosters continuous improvement and builds teacher confidence, ultimately benefiting student learning and instructional effectiveness.

Fostering a Growth Mindset in Teachers

Fostering a growth mindset in teachers is a cornerstone of instructional coaching. Coaches encourage teachers to embrace challenges, view failures as opportunities to learn, and believe in their capacity to grow. By providing support and resources, coaches empower teachers to take ownership of their professional development. This mindset shift helps teachers adapt to new strategies, persist through difficulties, and continuously improve their practice, ultimately benefiting both their own growth and student learning outcomes.

Training and Support for Instructional Coaches

Instructional coaches receive professional development through structured programs, expert-led training, and access to resources, ensuring they can effectively support teachers in improving instructional practices and student outcomes.

The Importance of Professional Development for Coaches

Professional development is crucial for instructional coaches to enhance their skills and stay updated on best practices. Through structured programs and expert-led training, coaches gain the knowledge and strategies needed to effectively support teachers. This development ensures coaches can address diverse teaching challenges, implement evidence-based practices, and foster a growth mindset in educators. Continuous learning enables coaches to adapt to evolving educational needs, ultimately improving teaching quality and student outcomes. Investing in coach development is essential for sustaining impactful instructional coaching initiatives.

Key Skills and Knowledge for Instructional Coaches

Instructional coaches need strong communication, observation, and feedback skills to support teachers effectively. They must be knowledgeable about evidence-based teaching strategies, curriculum design, and data analysis. Coaches should also understand adult learning principles and how to foster a growth mindset. Emotional intelligence, cultural awareness, and the ability to build trust are essential. Coaches must stay updated on educational trends and be adept at facilitating professional conversations. These skills enable coaches to tailor their support to meet the unique needs of teachers and schools.

Resources and Tools for Instructional Coaches

Instructional coaches rely on various resources, such as professional development programs, teaching strategy guides, and data analysis tools. They often use frameworks like Jim Knight’s Impact Cycle and Marzano’s instructional strategies. Tools like classroom observation checklists and feedback templates are essential. Coaches also benefit from digital platforms for lesson planning and progress tracking. Additionally, books, webinars, and online courses provide ongoing learning opportunities. These resources enable coaches to effectively support teachers in enhancing instructional practices and achieving student learning goals.

Case Studies and Examples

A district implemented ELA and math coaches, trained using Jim Knight and Marzano ideologies, improving teaching practices. An instructional coach helped a teacher enhance student engagement by refining lesson delivery strategies.

Successful Instructional Coaching Programs in Schools

Many schools have successfully implemented instructional coaching programs, leading to improved teaching practices and student outcomes. For example, a district adopted ELA and math coaches, trained using Jim Knight and Marzano methodologies, to enhance instruction. Coaches worked closely with teachers, providing feedback and strategies to refine lesson delivery. These programs emphasized building trust, fostering collaboration, and using data to inform coaching. As a result, teachers reported increased confidence, and students showed measurable learning improvements. Such initiatives demonstrate the transformative potential of well-structured instructional coaching in education.

Real-World Examples of Instructional Coaching in Action

In a middle school, instructional coaches worked with teachers to enhance student engagement. Through observations and feedback, coaches helped implement interactive lesson plans, resulting in higher student participation. Another example involved a district training coaches in Jim Knight’s methods, leading to improved teacher confidence and classroom strategies. Coaches also supported teachers in aligning lessons with curriculum standards, fostering a culture of continuous improvement. These real-world examples highlight how instructional coaching directly impacts teaching practices and student success through collaborative and targeted support.

Future Trends in Instructional Coaching

Future trends include integrating technology, expanding coaching to diverse subjects, and embedding coaching into school improvement plans to enhance teacher development and student outcomes effectively.

The Role of Technology in Instructional Coaching

Technology is revolutionizing instructional coaching by enabling remote observations, data-driven feedback, and personalized learning strategies. Tools like video conferencing and digital platforms allow coaches to support teachers across distances. Data analytics help track progress and tailor interventions, while AI-powered systems provide real-time insights. Technology also facilitates resource sharing and collaborative planning, making coaching more accessible and efficient. As tech evolves, it promises to enhance the scalability and consistency of instructional coaching, ensuring more teachers benefit from targeted professional development and improved student outcomes.

Expanding Instructional Coaching to Different Subject Areas

Instructional coaching is increasingly being applied across various subjects, including math, science, and humanities. Coaches adapt strategies to meet subject-specific needs, such as data-driven interventions in STEM or literacy-focused techniques in English. This expansion ensures equitable support for all teachers, fostering improved teaching practices and student outcomes. By tailoring coaching to diverse disciplines, schools can address unique challenges and leverage subject matter expertise, ultimately enriching the educational experience for both teachers and students.

Integrating Instructional Coaching into School Improvement Plans

Instructional coaching is a vital component of school improvement plans, aligning with broader educational goals. Coaches collaborate with school leaders to identify priorities, such as enhancing teaching strategies or boosting student performance. By integrating coaching into these plans, schools ensure a focused, data-driven approach to professional development. This alignment fosters a culture of continuous improvement, where coaching supports teacher growth and student success. Regular monitoring and feedback loops help refine strategies, ensuring coaching efforts remain impactful and aligned with school-wide objectives.

Instructional coaching is a powerful tool for enhancing education, fostering teacher growth, and improving student outcomes through collaborative, targeted strategies.

Summarizing the Key Points

Instructional coaching is a collaborative, goal-oriented process focusing on enhancing teaching practices and student outcomes. It involves expert coaches working with teachers to identify needs, set goals, and implement effective strategies. Unlike mentoring or evaluation, coaching emphasizes mutual respect and growth. It is not a one-size-fits-all approach but tailored to individual and school needs. By fostering a growth mindset and providing timely feedback, instructional coaching supports professional development and creates a culture of continuous improvement in education.

The Future of Instructional Coaching in Education

The future of instructional coaching lies in its integration with technology, expanding to diverse subjects, and aligning with school improvement plans. Coaches will leverage digital tools for remote support and data-driven practices. As schools adopt coaching models, the demand for trained professionals will grow, emphasizing the need for structured programs. Coaching will become a cornerstone of professional development, fostering a culture of continuous growth and collaboration. By addressing evolving educational needs, instructional coaching will play a pivotal role in shaping the future of teaching and learning.

Continue Reading

teachers instruction in a class on pointillism

Pointillism, a captivating art technique, uses small, distinct dots of color, not strokes, to form an image. This method, pioneered by Georges Seurat and Paul Signac, creates optical color mixing, where the viewer’s eye blends the colors.

Defining Pointillism

Pointillism, also referred to as Neo-Impressionism or Divisionism, is an innovative painting technique that deviates from traditional brushstrokes. Instead of blending colors on a palette or canvas, artists apply small, distinct dots of pure color to the surface. The magic of pointillism lies in the optical mixing that occurs in the viewer’s eye when observing the artwork from a distance. These dots blend visually, creating the illusion of different colors and shades. This technique relies on the principle that the human eye can fuse small, separate points of color into a unified image. The result is a vibrant, luminous effect that captures the essence of light and color in a unique way. This departure from traditional methods allows for the creation of visually complex and intricate scenes using a seemingly simple technique of dots.

The Historical Context⁚ Georges Seurat and Paul Signac

Pointillism emerged in the late 19th century, largely attributed to the innovative work of Georges Seurat and Paul Signac. Seurat, considered the founder of this technique, meticulously explored the science of optics and color theory, leading to his unique approach of applying pure color dots. His monumental work, “A Sunday Afternoon on the Island of La Grande Jatte,” exemplifies this style. Paul Signac, another prominent figure, further developed and promoted pointillism, collaborating with Seurat and creating his own impressive body of work. These two artists moved away from the Impressionist’s broken brushstrokes, instead relying on the optical mixing of tiny dots. Their commitment to rigorous methodology and scientific understanding of color laid the foundation for this groundbreaking artistic movement, influencing generations of artists and their approach to color and composition.

Teaching Pointillism in the Classroom

Introducing pointillism to students offers a unique perspective on color and art creation. This method encourages patience, precision, and an understanding of optical blending through tiny dots.

Introducing Pointillism to Students

Begin by showing students examples of pointillist art, particularly the works of Georges Seurat, highlighting how the images are composed of small dots. Explain that the colors appear to blend when viewed from a distance, this is called optical mixing. Discuss how pointillism differs from traditional painting methods. Emphasize that instead of brushstrokes, small dots of pure color are used. Show them examples of works from Seurat, like “A Sunday Afternoon on the Island of La Grande Jatte,” emphasizing the technique’s ability to create vibrant, luminous effects. Encourage students to examine the artworks closely and from a distance, observing the optical blending in action. Explain the process is about using the dots to create the illusion of shape and colors. Start with a simple, fun explanation. Then, show the students the materials that they will use in their own work.

Essential Vocabulary⁚ Dots, Divisionism, Color Mixing

Introduce the term “dots” as the fundamental element of pointillism, emphasizing that these small marks are the building blocks of the entire artwork. Explain “divisionism,” another name for pointillism, highlighting the separation of colors into distinct dots. Discuss “color mixing” and how it occurs not on the palette but in the viewer’s eye, when looking at the dots. Explain that the juxtaposition of different colors creates the illusion of blended tones, this is called “optical mixing.” Show examples of how different colored dots placed next to each other can create a new color. For example, that blue and yellow dots create the illusion of green. Ensure students grasp the interplay between these three essential concepts. Understanding these concepts is key to creating their own pointillist art; This will help them understand the technique.

Materials Needed⁚ Watercolors, Q-tips, Paper

For a successful pointillism lesson, gather the following materials⁚ watercolors, which offer vibrant color and are easy to use for dot application. Provide a variety of colors to allow for experimentation and color mixing. Q-tips serve as the primary tool for applying paint, creating the characteristic dots of pointillism. These are easy for young children to use. Ensure you have a sufficient quantity of Q-tips to avoid color contamination. Use watercolor paper as the surface for painting. It is thicker than normal paper and will absorb the paint without buckling. Ensure the paper is of good quality and appropriate thickness for wet mediums. Have a palette or plastic plate for placing small amounts of paints. Provide also water containers. It is crucial to prepare all materials before beginning the lesson. This will help the students to be ready to start.

Practical Application of Pointillism

Students will explore pointillism by creating a color wheel, using stippling with ink, and learning how to shade with single and multiple colors. This will help them master pointillism techniques.

Creating a Color Wheel Using Pointillism

The creation of a color wheel using pointillism is a great way for students to grasp color theory and the optical blending of colors. Start by drawing a circle and dividing it into twelve equal segments. Each segment will represent a color, beginning with the primary colors⁚ red, yellow, and blue. Then, students can use dots of pure color in each segment, carefully arranging them to create secondary and tertiary colors. For instance, placing small dots of yellow next to dots of blue will give the illusion of green. This exercise demonstrates the core of pointillism, where colors aren’t mixed on a palette but are optically blended by the viewer. Students will learn how to use dots to create a spectrum of hues and how the proximity of dots influences perceived color. Using this method, students will understand how pointillism works and that they will be able to apply it to other artworks.

Stippling Techniques with Ink

Stippling with ink offers a fascinating way to explore value and shading using a pointillist technique. Begin by explaining that stippling is essentially pointillism using only black ink. Students should practice creating different densities of dots to represent different values. A dense concentration of dots will create a dark area, while sparse dots will create a lighter area. This technique allows for detailed shading without traditional lines. The key is to vary the spacing and size of the dots to achieve the desired effect. Encourage students to practice this technique by creating a value scale. This will help them understand how to control the density of their stippling to create gradients. The use of ink also allows for more precision. This technique will prepare them for more complicated projects and will help them to master the style.

Shading with Single and Multiple Colors

Shading in pointillism involves strategically placing dots to create the illusion of depth and form. When using a single color, students can achieve shading by varying the density of dots. More dots create darker areas, while fewer dots create lighter areas. This technique allows students to understand the basics of value control within pointillism. Introducing multiple colors adds a layer of complexity. Students learn to create shadows by layering dots of darker colors over lighter ones. Similarly, highlights are created by using lighter colors with fewer dots. By combining colors, students will see that the colors will combine in the eyes of the viewer. Encourage experimentation with color mixtures to find the best way to shade the object they are painting. With these techniques, depth and volume can be brought to their work.

Pointillism Art Projects for Students

Engage students with pointillism projects like self-portraits, landscapes, or abstract designs. These hands-on experiences solidify their understanding. It is important to encourage individual creativity and allow for free expression.

Self-Portraits in Pointillism Style

Guiding students to create self-portraits using pointillism offers a unique blend of self-expression and technical skill development. Begin by having students look closely at their own faces, paying attention to the light and shadow. Encourage them to lightly sketch their portrait outlines on paper. This initial sketch will serve as a guide for placing the dots of color; When starting with color application, it is important to start with primary colors.
Explain the importance of color mixing through the use of dots, not by blending paint on a palette. For example, small dots of red and yellow will create an orange effect when viewed from a distance. This allows students to understand how individual dots interact to create an illusion of form and color. Emphasize the use of pure color. This exercise also enhances their observational skills and artistic understanding of pointillism;

Landscape Pointillism

Transitioning to landscape pointillism, guide students to observe natural scenes, focusing on light, shadow, and the variety of colors within the landscape. Start by having them lightly sketch a basic landscape outline, including elements like trees, hills, and the sky. Discuss how different colors can represent different elements in the scene. For instance, varying shades of green can be used for the foliage, while blues and whites might represent the sky. The use of primary colors is very important.
Instruct students to apply their colors using the pointillist technique. Encourage them to use different colored dots, placed closely together, to create the illusion of depth and texture in the landscape. Explain the concept of aerial perspective in a pointillistic style. For instance, objects that are farther away can appear less vibrant, using lighter color intensity. This project allows students to explore color mixing through dots and develop a deeper appreciation for capturing natural beauty through art.

Creating Abstract Pointillism Art

Abstract pointillism offers students a unique opportunity to explore color and form without the constraints of representational art. Begin by encouraging students to move beyond traditional subjects, focusing instead on feelings and ideas. They can create abstract compositions using a variety of colors, patterns, and arrangements of dots. Discuss how different color combinations can evoke different emotions. Warm colors like reds and yellows can create a sense of energy and excitement, while cooler colors like blues and greens can create a calmer feeling.
Instruct the students to experiment with varying dot sizes and densities. Closely spaced dots will give an impression of solid color, while sparser dots will create a lighter, more translucent effect. Encourage students to layer colors, allowing some dots to overlap and mix optically. By using this technique, they will see how their own abstract artwork can be created by using the pointillism method, without any rules.

Assessment and Resources

Evaluate student understanding through their pointillism creations, focusing on color mixing and stippling techniques. Utilize lesson plans, worksheets, and online resources for effective teaching and further exploration of this art form.

Lesson Plan Resources for Teachers

Teachers can find many resources to plan engaging pointillism lessons. Websites like Study.com offer lesson plans that explain pointillism’s key concepts. Pinterest boards provide visual inspiration and project ideas, such as self-portraits and landscapes, in a pointillist style. Twinkl offers PowerPoints to introduce the style to children. Resources include guides on color theory and the history of Georges Seurat and Paul Signac. Lesson plans often incorporate hands-on activities using Q-tips, watercolors, and markers. Some resources include project ideas, techniques on stippling and shading, and also assessment strategies. These materials help teachers structure lessons that are both informative and fun. Many sites offer free downloadable worksheets and templates. Additionally, many resources include how to teach the key vocabulary like “dots”, “divisionism”, and “color mixing”. These lesson plans help create a rich and comprehensive learning experience.

Pointillism Worksheets and Templates

Worksheets and templates are invaluable tools for teaching pointillism. These resources often include activities that help students understand the technique’s core principles. Teachers can find templates with pre-drawn shapes or outlines for students to fill with dots, which can help ease the learning process. Worksheets may also include color mixing exercises and practice with stippling and shading techniques. Value scale exercises that use stippling are also included. Some resources offer templates for creating landscapes or portraits with a pointillist touch. These templates can include outlines of famous paintings that are to be copied in this style. Additionally, many worksheets include vocabulary exercises, helping students learn key terms such as “divisionism” and “pure color.” These resources aid teachers in providing a structured learning experience, and often include assessment rubrics. The variety of materials makes lessons engaging and helps students grasp the concepts more effectively.

Continue Reading

oral hygiene instruction

Oral hygiene instruction is crucial for maintaining good oral health‚ using short simple sentences to guide patients through procedures like brushing and flossing with a soft toothbrush daily.

Importance of Clear Instructions

Clear instructions are essential for effective oral hygiene‚ as they enable patients to understand and follow proper techniques; Using short‚ simple sentences to guide patients through procedures like brushing and flossing can help prevent confusion and ensure they are performed correctly. This is particularly important for individuals who may be unsure about how to properly care for their teeth and gums. By providing clear instructions‚ patients can develop good oral hygiene habits and reduce their risk of oral health problems. Additionally‚ clear instructions can help patients feel more confident and motivated to maintain their oral health‚ leading to better overall health outcomes. Effective communication is key to successful oral hygiene instruction‚ and clear instructions play a critical role in this process‚ helping patients to establish a consistent and effective oral hygiene routine. Proper instruction can also help to prevent common oral health issues.

Brushing Techniques

Oral hygiene instruction involves using small circular motions with a soft toothbrush to clean teeth effectively daily with fluoride toothpaste.

Brushing Frequency and Duration

Oral hygiene instruction emphasizes the importance of brushing teeth at least twice a day‚ with each session lasting for two minutes to ensure thorough cleaning. This frequency helps maintain good oral health by removing plaque and bacteria that can cause cavities and gum disease. The duration of brushing is also crucial‚ as it allows for adequate time to clean all surfaces of the teeth. Using a soft-bristled toothbrush and fluoride toothpaste‚ individuals should brush their teeth in the morning and before going to bed‚ making sure to cover all areas of the mouth. By following this routine‚ individuals can help prevent oral health issues and maintain a healthy smile. Regular brushing also helps to remove food particles and stains‚ leaving teeth feeling clean and fresh. Overall‚ brushing frequency and duration are essential components of oral hygiene instruction. Proper brushing habits can help individuals maintain good oral health throughout their lives.

Interdental Cleaning

Cleaning between teeth is essential for removing food particles and plaque with interdental brushes or floss daily for good oral hygiene.

Flossing and Interdental Brushes

Flossing and using interdental brushes are essential for removing food particles and plaque from between teeth and under the gumline. This helps to prevent gum disease and promote good oral health.
Using floss or interdental brushes daily can help to remove plaque and bacteria that can cause cavities and gum disease.
It is recommended to use floss or interdental brushes at least once a day‚ preferably before brushing teeth.
Flossing and interdental brushes come in different sizes and types‚ and it is important to choose the right one for your teeth and gums.
Regular use of floss and interdental brushes can help to keep your teeth and gums healthy‚ and prevent oral health problems.
By incorporating flossing and interdental brushes into your oral hygiene routine‚ you can help to maintain good oral health and prevent problems.
It is also important to use the correct technique when flossing or using interdental brushes to ensure that you are removing plaque and bacteria effectively.
Using floss or interdental brushes is an important part of a comprehensive oral hygiene routine.

Additional Tips for Good Oral Hygiene

Visit dentist regularly and clean between teeth daily for optimal oral health benefits always.

Visiting the Dentist and Cleaning Between Teeth

Regular dental visits are essential for maintaining good oral health‚ as they allow dentists to identify and address any potential issues early on. Cleaning between teeth is also crucial‚ as it helps to remove plaque and food particles that can become trapped. Using floss or interdental brushes can help to clean these areas‚ and should be done at least once a day. Additionally‚ visiting the dentist regularly can help to prevent problems such as tooth decay and gum disease. By combining regular dental visits with good oral hygiene habits‚ individuals can help to keep their teeth and mouth healthy. This can also help to prevent bad breath and boost confidence in one’s smile. Overall‚ visiting the dentist and cleaning between teeth are important parts of a good oral hygiene routine. Regular cleaning and check-ups can help to keep the mouth healthy.

Effective Brushing Methods

Using small circular motions with a soft toothbrush is effective for cleaning teeth thoroughly every day.

Brushing After Flossing

Brushing after flossing is a recommended oral hygiene practice‚ as it helps to remove any remaining food particles and plaque from the teeth. This method is considered more effective than brushing before flossing‚ as it allows for a more thorough cleaning of the teeth. By flossing first‚ individuals can remove any large food particles and debris that may be lodged between the teeth‚ and then brush their teeth to remove any remaining plaque and bacteria. Using a soft-bristled toothbrush and fluoride toothpaste‚ individuals can gently brush their teeth in small circular motions‚ making sure to cover all surfaces of the teeth. This technique can help to prevent gum disease and promote overall oral health. Regular brushing and flossing can also help to prevent bad breath and promote a healthy‚ clean smile. Proper oral hygiene techniques are essential for maintaining good oral health.

Continue Reading

igloo ice machine instructions

The Igloo Ice Maker is a convenient machine producing up to 28 lbs of ice daily with easy instructions and troubleshooting tips available online for users to follow correctly always.

Overview of the Igloo Ice Maker

The Igloo Ice Maker is a reliable and efficient machine that produces a significant amount of ice per day. With its ability to store up to 4 bags of ice at one time, it provides users with a convenient way to have fresh ice ready whenever needed. The machine is designed to be portable and compact, making it easy to place on countertops or take on the go. According to online manuals, the Igloo Ice Maker has a fully automatic control system and an advanced microcomputer that simplifies the ice-making process. Users can select from different ice cube sizes with the touch of a button, making it a user-friendly appliance. Overall, the Igloo Ice Maker is a great addition to any home or office, providing a steady supply of fresh ice with minimal effort required. Its features and design make it an ideal choice for those looking for a convenient ice-making solution.

Key Features of the Igloo Ice Maker

The Igloo Ice Maker has several key features that make it a popular choice among users. It can produce up to 26 lbs of ice in 24 hours, with ice cubes ready in as little as 6-8 minutes. The machine also comes with a self-cleaning function, making maintenance easy and convenient. Additionally, it has a handled portable design, allowing users to easily move it around. The Igloo Ice Maker also includes an ice scoop and basket, making it easy to serve and store ice. Other features include a fully automatic control system and an advanced microcomputer that simplifies the ice-making process. The machine is also available in different colors, such as aqua, and has a compact design that fits easily on countertops. These features combined make the Igloo Ice Maker a convenient and reliable appliance for any home or office. Its compact design and portability make it ideal for small spaces.

Operating the Igloo Ice Maker

Operating the Igloo Ice Maker is simple and fast with easy instructions available online always.

Pre-Operating Instructions

To ensure safe and efficient operation of the Igloo Ice Maker, it is essential to follow the pre-operating instructions carefully. The user manual provides a detailed guide on how to prepare the machine for use. First, the user needs to unpack the machine and remove all packaging materials. Then, the user should wash the ice basket and scoop with warm soapy water to remove any dirt or debris. The machine should be placed on a flat and stable surface, away from direct sunlight and heat sources. The user should also read the safety precautions and warnings provided in the manual to avoid any accidents or injuries. By following these pre-operating instructions, the user can ensure that the Igloo Ice Maker is ready for use and will produce high-quality ice cubes. The manual is available online for easy access and reference.

Operating Instructions

The Igloo Ice Maker is easy to operate, and the user manual provides step-by-step instructions. To start making ice, the user needs to add water to the reservoir, plug in the machine, and press the ON button. The machine will automatically start producing ice cubes in 6-8 minutes. The user can select one of the three ice cube sizes using the control panel. The machine will stop producing ice when the ice basket is full or when the water level is low. The user can monitor the ice-making process through the transparent window and check the water level through the indicator. The machine also features an automatic shut-off system for safety and energy efficiency. By following the operating instructions, the user can enjoy fresh and clean ice cubes at any time. The Igloo Ice Maker is designed for convenient and hassle-free ice making, making it perfect for home and office use.

Cleaning and Maintenance

Cleaning the Igloo Ice Maker regularly ensures optimal performance and longevity always using proper techniques.

Cleaning Instructions

To ensure the Igloo Ice Maker continues to function properly, regular cleaning is necessary. The machine’s parts and functions should be understood before cleaning, as outlined in the user manual. Cleaning instructions typically involve unplugging the machine, washing the ice basket and scoop with warm soapy water, and wiping down the exterior with a damp cloth. It is also important to descale the machine every 3-6 months to prevent mineral buildup. The user manual provides detailed cleaning instructions, including how to access and clean hard-to-reach areas. Following these instructions will help maintain the machine’s performance and extend its lifespan. Additionally, the Igloo Ice Maker’s self-cleaning function can be used to simplify the cleaning process. By following the recommended cleaning schedule and instructions, users can keep their Igloo Ice Maker in good working condition and ensure it continues to produce clean and fresh ice. Regular cleaning is essential for optimal performance.

Troubleshooting Tips

Troubleshooting tips are available for the Igloo Ice Maker to help users resolve common issues; The user manual provides a list of potential problems and solutions, such as what to do if the machine is not producing ice or if the ice is not the correct size. Additionally, online resources and customer support are available to assist with troubleshooting. Some common issues can be resolved by checking the water level, ensuring the machine is properly plugged in, and verifying that the ice maker is turned on. If the issue persists, users can refer to the troubleshooting guide or contact the manufacturer for further assistance. By following these tips, users can quickly identify and resolve problems with their Igloo Ice Maker, minimizing downtime and ensuring they have a steady supply of fresh ice. The troubleshooting guide is an essential resource for any Igloo Ice Maker owner. Regular maintenance can also help prevent issues.

The Igloo Ice Maker instructions provide a comprehensive guide for users to operate and maintain their machine effectively always with easy steps.

Final Thoughts on Igloo Ice Machine Instructions

The Igloo Ice Maker instructions are a valuable resource for users to get the most out of their machine. With a comprehensive guide, users can easily operate and maintain their ice maker. The instructions provide a step-by-step approach to troubleshooting and maintenance, ensuring that the machine runs smoothly and efficiently. By following the instructions, users can enjoy fresh ice whenever they need it. The Igloo Ice Maker is a convenient and reliable machine that produces up to 28 lbs of ice per day. The instructions are available online, making it easy for users to access and follow them. Overall, the Igloo Ice Maker instructions are an essential tool for anyone looking to get the most out of their ice maker. The instructions are easy to follow and provide a comprehensive guide to operating and maintaining the machine.

Continue Reading