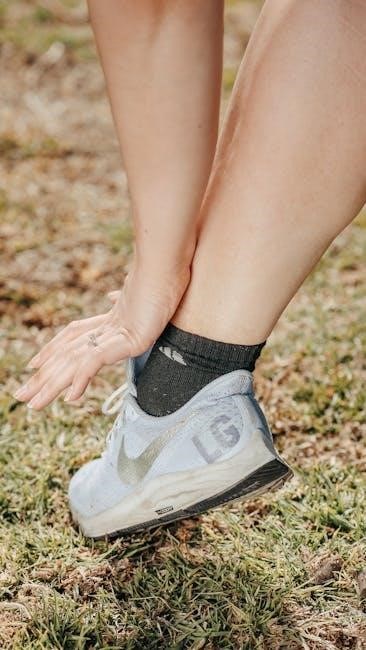
Achilles tendonitis impacts many athletes, and KT Tape offers a dynamic support solution; downloadable guides, like those from Vamos de Tapas, detail application techniques.
Kinesiology tape, including brands like KT Tape and Kinesio Tape, has gained popularity over the last 50 years for athletic support and pain management.
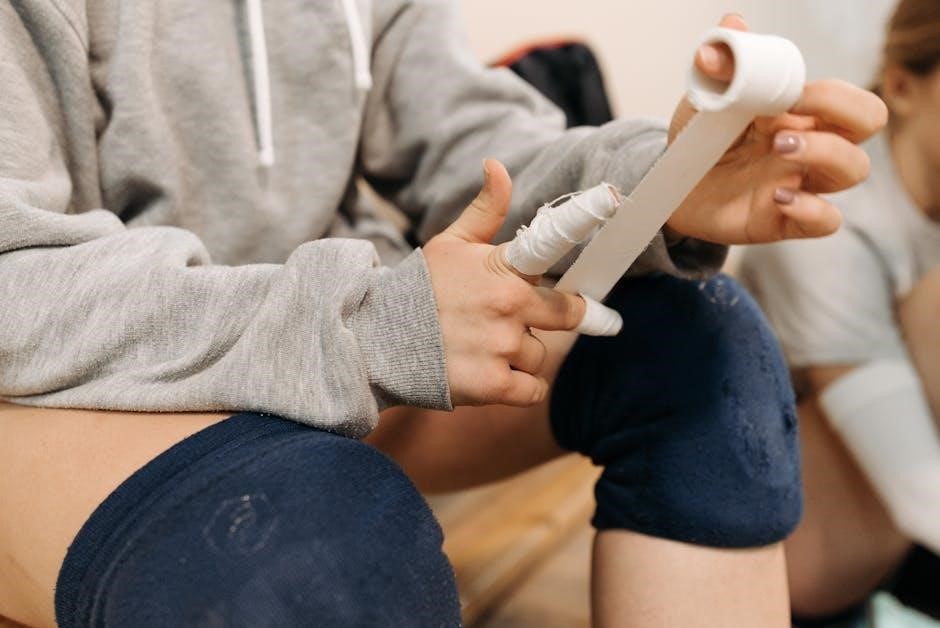
Dr. Gregory H. Doerr’s video demonstrations provide a step-by-step process for applying tape to the Achilles tendon and calf, promoting healing and reducing tendon load.
What is Achilles Tendonitis?
Achilles tendonitis, a common ailment among athletes, involves inflammation of the Achilles tendon, the largest tendon in the body. This robust tendon connects the calf muscles to the heel bone, facilitating walking, running, and jumping. Overuse or sudden increases in activity levels frequently trigger this condition, leading to pain, stiffness, and tenderness along the tendon.
Symptoms often develop gradually, starting as mild discomfort after exercise and progressing to persistent pain that interferes with daily activities. Individuals may experience pain in the back of the heel, especially in the morning or after periods of rest. Ignoring early signs can lead to chronic pain and potential tendon rupture.
Effective management often involves rest, ice, compression, and elevation (RICE), alongside supportive therapies like KT Tape application to reduce strain and promote healing.
Understanding Kinesiology Tape (KT Tape)
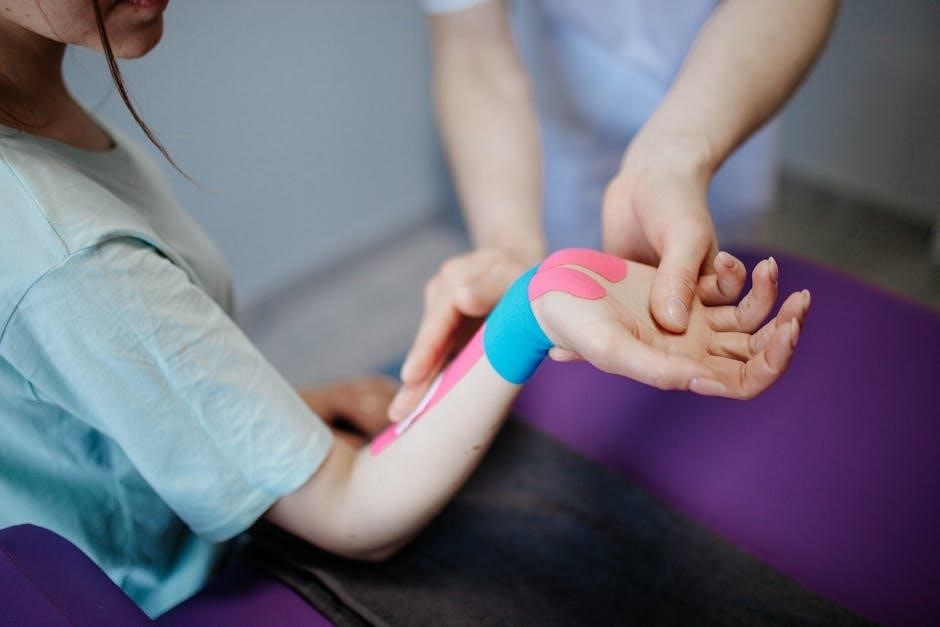
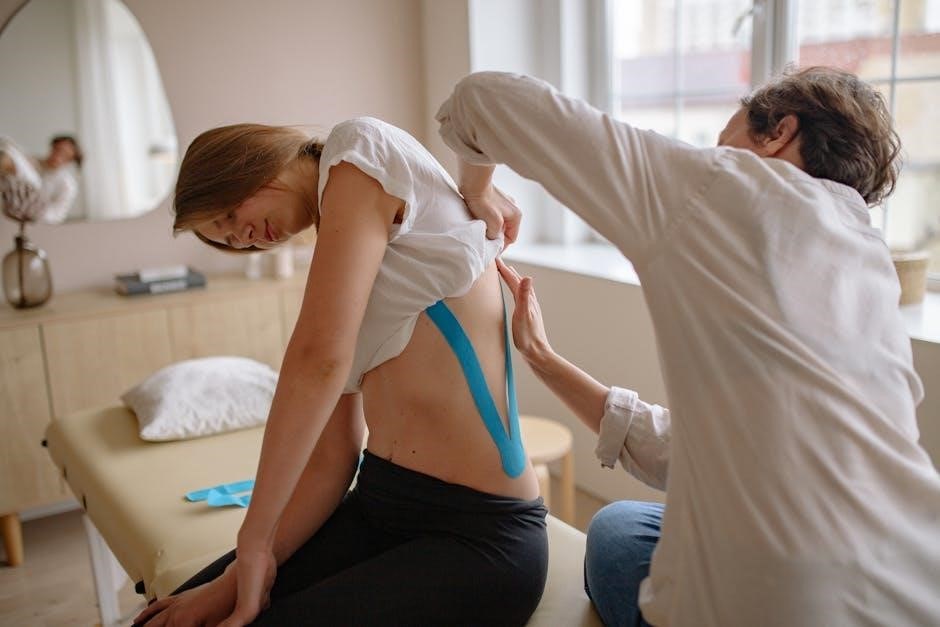
Kinesiology Tape, often recognized by the brand name KT Tape, is an elastic cotton strip with an acrylic adhesive backing. Developed decades ago, it’s designed to mimic the elasticity of human skin, allowing for a full range of motion while providing support. Unlike traditional athletic tape, KT Tape doesn’t restrict movement; instead, it facilitates it.
The tape’s unique properties aim to lift the skin slightly, creating space between the skin and the underlying tissues. This decompression can improve blood flow and lymphatic drainage, reducing swelling and pain. It’s available in various colors and widths, catering to different needs and preferences.
Athletes have embraced KT Tape for its potential to enhance performance and aid recovery, making it a visible fixture at events like the Olympics.
How KT Tape Works: A Brief Overview
KT Tape’s functionality centers around influencing the body’s natural healing processes. By gently lifting the skin, it creates microscopic space, theoretically improving circulation and reducing inflammation around the Achilles tendon. This decompression can alleviate pressure on pain receptors, providing immediate discomfort relief.
The tape’s elastic properties offer dynamic support, meaning it moves with the body, unlike restrictive bracing. This allows for continued activity while providing stability to the injured area. Some believe KT Tape also influences muscle activation and proprioception – the body’s awareness of its position in space.
However, recent studies suggest the benefits may be more psychological than physiological, highlighting the power of the placebo effect.
Preparing for KT Tape Application
Successful KT Tape application requires clean, dry skin and a sharp pair of scissors; proper preparation maximizes adhesion and effectiveness for Achilles tendonitis support.
Skin Preparation: Cleaning and Shaving
Optimal KT Tape adhesion hinges on meticulous skin preparation. Before application, thoroughly cleanse the area around the Achilles tendon with mild soap and water to remove any oils, lotions, or dirt. These residues can significantly impede the tape’s ability to stick properly, leading to premature lifting and reduced effectiveness.
For individuals with excessive hair in the application area, shaving is highly recommended. Hair interferes with the tape’s direct contact with the skin, diminishing its therapeutic benefits. Use a razor to gently shave the area in the direction of hair growth, avoiding any irritation or cuts.
Ensure the skin is completely dry before proceeding with the taping process. Any moisture will compromise the adhesive properties of the KT Tape. A clean, dry, and hair-free surface guarantees a secure and long-lasting application, maximizing the support and pain relief for Achilles tendonitis.
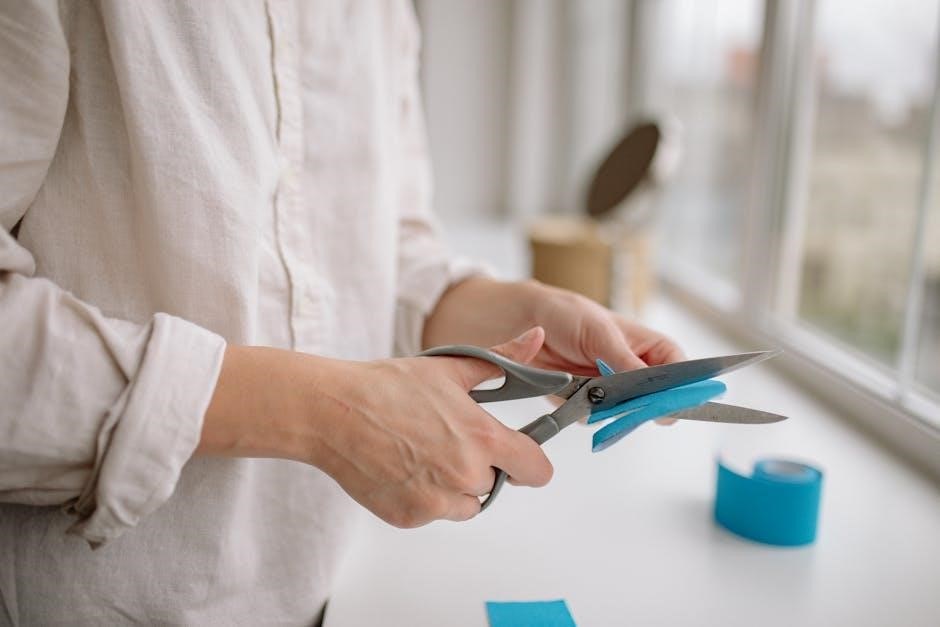
Materials Needed: KT Tape, Scissors
Successful KT Tape application for Achilles tendonitis requires only a few essential materials. First and foremost, you’ll need a roll of high-quality kinesiology tape – commonly known as KT Tape or Kinesio Tape. Selecting a reputable brand ensures optimal elasticity and adhesive properties for effective support.
A pair of sharp scissors is crucial for precise tape cutting. Rounded-tip scissors are recommended for safety, preventing accidental skin punctures during the trimming process. The ability to cut the tape to the correct length and width is vital for a customized and comfortable fit.
Beyond these core items, having an alcohol wipe for final skin cleaning and potentially some pre-cut “I” strips (optional) can streamline the application. With these simple tools, you’re well-equipped to provide dynamic support and pain relief for your Achilles tendon.
Tape Types and Considerations
When selecting KT Tape for Achilles tendonitis, understanding the available options is key. Standard KT Tape offers reliable support, while pre-cut strips can simplify application for beginners. Different brands, like KT Tape and Kinesio Tex Tape, may vary slightly in adhesive strength and elasticity.
Tape color is largely aesthetic; pink, blue, black, and beige options are available. However, consider skin sensitivity – individuals with allergies should opt for hypoallergenic tape. Tape width also matters; wider strips provide more substantial support, while narrower strips offer greater flexibility.
Ultimately, the best tape is one that adheres well, feels comfortable, and meets your individual needs. Experimenting with different types may be necessary to find the optimal solution for your Achilles tendonitis and activity level.
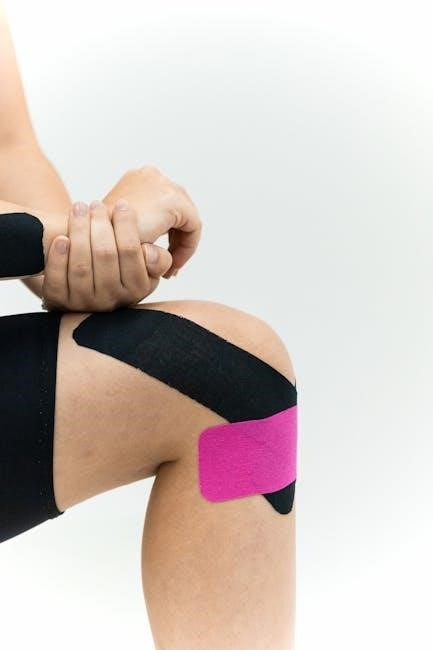
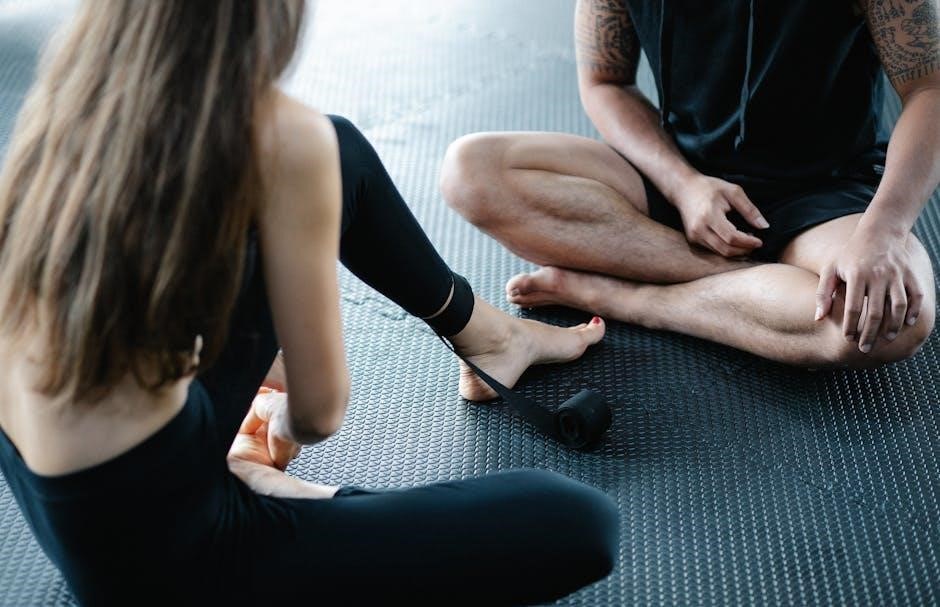
Step-by-Step KT Tape Application Guide
Applying KT Tape for Achilles tendonitis requires precision; a sharp pair of scissors and clean skin are essential for optimal results, taking only about two minutes.
Step 1: Anchor Placement – Medial Heel
Begin with the anchor placement, crucial for effective KT Tape application. Tear a strip of KT Tape, approximately 6-8 inches long, rounding the corners to prevent premature lifting. Position the ankle in a neutral position – neither pointed nor flexed. Apply the anchor to the medial heel, just below the ankle bone, with zero stretch.
Ensure the anchor is firmly adhered to the skin, forming a stable base for the subsequent tape strips. This initial anchor provides a foundation for supporting the Achilles tendon. Gently rub the tape to activate the adhesive and ensure a secure hold. Proper anchor placement is paramount for the overall effectiveness of the taping process, setting the stage for optimal support and pain relief.
Step 2: First Strip – Supporting the Achilles Tendon
With the anchor secure, apply the first strip of KT Tape directly over the Achilles tendon. Tear another strip, similar in length to the first (6-8 inches), and apply it with a 50-75% stretch. Begin at the medial heel anchor and follow the line of the Achilles tendon upwards towards the calf muscle.
Maintain consistent tension throughout the application, gently smoothing the tape as you go. This strip aims to provide direct support to the tendon, reducing strain and promoting proper alignment. Avoid excessive stretch, which can cause skin irritation; The goal is to lift the skin slightly, creating space and reducing pressure on the inflamed tendon. Rub the tape to activate the adhesive.
Step 3: Second Strip – Reinforcing Support
To further stabilize the Achilles tendon, apply a second strip of KT Tape parallel to the first. Tear another strip, again 6-8 inches long, and apply it with a similar 50-75% stretch. Start slightly medial to the first strip at the heel anchor, and follow a similar path upwards along the tendon.
This second strip reinforces the support provided by the first, creating a broader area of compression and stability. Ensure there’s a slight overlap with the first strip at both ends, but avoid complete coverage. Gently smooth the tape, activating the adhesive with rubbing. This technique helps distribute forces and minimize stress on the injured tendon, aiding in the healing process.
Step 4: Third Strip – Calves Support
For comprehensive support, a third strip of KT Tape targets the calf muscles, which directly influence Achilles tendon function. Cut a strip approximately 8-10 inches long. Anchor this strip with minimal stretch just above the medial gastrocnemius muscle (calf muscle), several inches above the Achilles tendon.
Apply the tape with 50-75% stretch as you guide it downwards and around the lower portion of the calf, crossing over the Achilles tendon area. This provides proprioceptive feedback and helps reduce muscle imbalances. Smooth the tape to activate the adhesive, ensuring a comfortable yet secure fit. This final strip enhances overall stability and supports the biomechanics of the lower leg.
Advanced KT Tape Techniques
Beyond basic application, techniques like space correction, mechanical correction, and swelling reduction can optimize KT Tape’s benefits for Achilles tendonitis relief.
Space Correction Technique
The Space Correction Technique with KT Tape for Achilles tendonitis aims to improve the space between the skin and the underlying tissues, potentially reducing compression and pain. This involves applying tape with a gentle stretch, creating wrinkles in the skin when relaxed.
Specifically, this technique focuses on lifting the fascia, the connective tissue surrounding the Achilles tendon. By gently lifting the fascia, it can allow for improved blood flow and reduced inflammation. The application typically involves strips running along the length of the tendon, with the ends anchored without stretch.
Proper application requires careful assessment of the affected area to determine the optimal direction and tension of the tape. It’s crucial to avoid overcorrection, which could exacerbate the condition. This technique is often used in conjunction with other KT Tape applications for a comprehensive approach to Achilles tendonitis management.
Mechanical Correction Technique
The Mechanical Correction Technique utilizes KT Tape to directly support the Achilles tendon, aiming to improve its biomechanical function during movement. Unlike the space correction method, this focuses on providing external stability to the tendon itself.
Application typically involves applying tape strips with a moderate to strong stretch directly over the Achilles tendon, following its natural path. This creates a supportive force that helps to reduce strain on the tendon during activities like walking or running. Anchoring the tape at both ends, without stretch, is essential for secure placement.
This technique is particularly useful for individuals experiencing pain during specific movements. It’s important to assess the individual’s gait and movement patterns to determine the optimal tape application for maximum benefit and to avoid restricting natural motion excessively.
Swelling Reduction Technique
The Swelling Reduction Technique with KT Tape aims to lift the skin, creating space between the tissue and the underlying fascia, thereby improving lymphatic drainage and reducing localized edema around the Achilles tendon. This is achieved through a specific application pattern designed to encourage fluid movement.
Application involves applying tape strips with a very light stretch, forming a fan-like pattern around the area of swelling. The anchor points should be applied without any stretch to ensure secure adhesion. The goal isn’t to provide strong support, but rather to gently lift the skin and facilitate fluid circulation.
This technique is best used in conjunction with other treatments like ice and elevation. It’s crucial to avoid applying tape too tightly, as this could restrict circulation. Regular reassessment of the swelling is recommended to monitor effectiveness.
Optimizing KT Tape Effectiveness
Achieving optimal results requires careful attention to tape tension, width selection, and application frequency; proper technique maximizes support and pain relief for Achilles tendonitis.
Tape Application Tension
Achieving the correct tension is crucial when applying KT Tape for Achilles tendonitis. Generally, for support, a moderate tension – around 50-75% – is recommended. This means stretching the tape as you apply it, but not to the point of causing discomfort or restricting movement.
Too little tension won’t provide adequate support, while excessive tension can impede circulation and irritate the skin. The goal is to create a gentle lifting effect on the skin, which helps to improve blood flow and reduce inflammation.
Consider the individual’s needs and pain levels when determining tension. For more severe cases, slightly higher tension might be beneficial, but always prioritize comfort and avoid causing further pain. Proper tension contributes significantly to the tape’s effectiveness in reducing tendon load and promoting healing.
Tape Width Selection
Choosing the appropriate KT Tape width is essential for effective Achilles tendonitis support. Standard widths, typically 2 or 3 inches, are commonly used, but the optimal choice depends on the area being taped and the individual’s anatomy.
For the Achilles tendon, a 2-inch width is often preferred as it provides sufficient coverage without being overly bulky. Wider tape (3 inches) can be used for larger areas or to provide more substantial support, particularly for athletes with significant inflammation.
Narrower tapes might be considered for more precise applications or for individuals with smaller builds. Experimenting with different widths can help determine what feels most comfortable and provides the best support. Always ensure the tape adheres well to the skin and doesn’t cause any irritation.
Application Frequency and Duration
KT Tape application for Achilles tendonitis isn’t a one-time fix; consistent use is key to experiencing its benefits. Typically, tape can be worn for 3-5 days, even during showering and other activities, due to its adhesive properties. However, monitor for any signs of skin irritation.
Reapplication frequency depends on activity level and symptom severity. Athletes engaging in high-impact activities may need to reapply tape more often than those with milder symptoms. It’s generally recommended to reapply when the tape begins to lift or lose its elasticity.
Between applications, allow the skin to rest for a short period to prevent irritation. Following proper skin preparation techniques, like cleaning and shaving, will maximize adhesion and comfort.
Troubleshooting Common Issues
Skin irritation, tape lifting, or incorrect application can occur; address these promptly by adjusting tension, ensuring clean skin, or seeking guidance.
Skin Irritation and Allergies
Skin sensitivity to the adhesive is a potential concern when using KT Tape. Some individuals may experience mild irritation, redness, or even a rash at the application site. This can often be mitigated by ensuring the skin is thoroughly cleaned and free of oils or lotions before applying the tape.
Shaving the area where the tape will be applied is also recommended to improve adhesion and reduce friction. If irritation persists, consider using hypoallergenic tape or pre-tape spray to create a barrier between the adhesive and the skin.
Allergic reactions are less common but possible. Symptoms may include intense itching, swelling, or blistering. If you suspect an allergic reaction, remove the tape immediately and consult a healthcare professional. Always test a small piece of tape on an inconspicuous area of skin before a full application to check for any adverse reactions.
Tape Lifting and Detachment
Premature lifting or detachment of KT Tape is a common issue, often stemming from inadequate skin preparation or improper application technique. Ensuring the skin is completely clean, dry, and free of oils is crucial for optimal adhesion. Avoid applying lotion or oils before taping.
Rounding the edges of the tape strips can help prevent snagging and lifting, especially during movement. Applying firm, even pressure as you adhere the tape ensures a secure bond.
Environmental factors like excessive sweating or water exposure can also contribute to detachment. While KT Tape is water-resistant, prolonged submersion can weaken the adhesive. If the tape begins to lift, carefully reapply it with fresh adhesive, or consider using tape adhesive spray for enhanced staying power.
Incorrect Application and Adjustments
Improper KT Tape application can diminish its effectiveness or even cause discomfort. If you experience skin irritation, altered sensation, or increased pain, immediately remove the tape. Review application guides, like those available in PDF format from Vamos de Tapas, and compare your technique to expert demonstrations, such as those by Dr. Gregory H. Doerr.
Adjustments may be necessary if the tape doesn’t provide the desired support or if it shifts during activity. Gently reposition the tape, ensuring proper tension and anchor points.
Avoid overstretching the tape, as this can lead to skin irritation or reduced recoil. Remember, the goal is to provide dynamic support, not restrict movement. If unsure, consult a physical therapist for personalized guidance.

KT Tape vs. Other Treatments
KT Tape complements rest, ice, and physical therapy for Achilles tendonitis; some studies suggest benefits may be more psychological than physiological.
It’s a pain management tool, offering dynamic support alongside traditional methods, as detailed in downloadable guides and expert videos.
Comparing KT Tape to Rest and Ice
Rest and ice are foundational treatments for Achilles tendonitis, aiming to reduce inflammation and allow initial healing; however, prolonged rest can lead to muscle weakness and stiffness.
KT Tape differs by providing dynamic support during activity, potentially allowing for continued movement and preventing further deconditioning, as demonstrated in guides from sources like Vamos de Tapas.
While ice addresses acute pain and swelling, KT Tape aims to influence muscle function and proprioception, offering a different approach to pain management.
Recent research suggests the benefits of kinesiology tape might be more related to psychological effects, but many athletes report tangible relief and improved function when using KT Tape alongside traditional methods.
Therefore, KT Tape isn’t necessarily a replacement for rest and ice, but rather a potentially valuable adjunct to a comprehensive rehabilitation plan.
KT Tape in Conjunction with Physical Therapy
Physical therapy is crucial for addressing the underlying biomechanical issues contributing to Achilles tendonitis, focusing on strengthening, flexibility, and proper movement patterns.
KT Tape can be strategically integrated into a physical therapy program to enhance treatment outcomes; it provides external support, allowing patients to participate more comfortably in exercises.
Guides, such as those available as a KT Tape PDF, demonstrate how to apply tape to facilitate muscle activation and improve proprioception, complementing therapeutic interventions.
Dr. Gregory H. Doerr’s techniques highlight how KT Tape can support the Achilles tendon and calf during rehabilitation, promoting optimal healing and function.
Ultimately, KT Tape serves as a valuable tool for physical therapists to augment their treatment plans, not as a standalone solution.
The Role of KT Tape in Pain Management
KT Tape offers a non-invasive approach to managing Achilles tendonitis pain, providing support and potentially reducing discomfort during activity. While the exact mechanisms are debated, some believe it influences pain perception.
The application of KT Tape, as detailed in KT Tape PDF guides, can create space between the skin and tissues, potentially reducing compression and inflammation around the Achilles tendon.
Dr. Gregory H. Doerr’s demonstrations showcase techniques aimed at providing dynamic support, which may alleviate pain and allow for a greater range of motion during rehabilitation.
It’s important to note that some studies suggest the benefits may be more psychological than physiological, but pain relief is still a valuable outcome.
KT Tape can be a useful adjunct to other pain management strategies, offering temporary relief and supporting a return to function.
Resources and Further Learning
Vamos de Tapas offers downloadable KT Tape guides (PDF) for Achilles tendonitis, while Dr. Gregory H. Doerr provides expert video demonstrations.
Explore industry-best Kinesio tape options for support and pain relief, enhancing your understanding of effective application techniques.
Downloadable KT Tape Guides (PDF)
Accessing comprehensive KT Tape guides in PDF format is a fantastic way to deepen your understanding of Achilles tendonitis management. Several resources are available online, offering detailed instructions and visual aids to support your learning journey.
Vamos de Tapas specifically provides a downloadable guide focused on KT Tape application for Achilles tendonitis, offering a structured approach to self-treatment. These guides typically include step-by-step instructions, diagrams illustrating proper tape placement, and explanations of the underlying principles behind the technique.
PDF guides allow for convenient offline access, enabling you to review the information at your own pace and refer to it during tape application. Look for guides that cover skin preparation, tape types, application techniques, and troubleshooting tips to maximize your success. Remember to always consult with a healthcare professional for personalized advice.
Video Demonstrations by Experts (Dr. Gregory H. Doerr)
Visual learning is incredibly beneficial when mastering KT Tape application, and expert video demonstrations offer invaluable guidance. Dr. Gregory H. Doerr is a recognized authority in kinesiology taping, providing clear and concise videos specifically for Achilles tendonitis.
These demonstrations showcase the precise hand movements and tape placement techniques necessary for effective support and pain relief. Watching an expert perform the application allows you to observe nuances that may be difficult to grasp from written instructions alone.
Dr. Doerr’s videos detail the step-by-step process, covering everything from skin preparation to final tape adjustments. Utilizing these resources, alongside downloadable PDF guides, ensures a comprehensive understanding of KT Tape for Achilles tendonitis. Accessing these videos will significantly improve your taping technique and confidence.
Where to Purchase KT Tape
Finding readily available KT Tape is essential for consistent support and recovery from Achilles tendonitis. Numerous retailers, both online and in physical stores, stock a variety of KT Tape brands and types.
Major sporting goods stores, like Dick’s Sporting Goods and Academy Sports + Outdoors, typically carry KT Tape alongside other athletic training supplies. Pharmacies, such as CVS and Walgreens, often have smaller selections available.
Online marketplaces like Amazon offer the widest range of options, including different colors, widths, and pre-cut strips. The official KT Tape website is also a direct source for purchasing products. Comparing prices and reading reviews before purchasing is always recommended to ensure quality and value.